How to Change Request or Response Headers in KurocoEdge
Overview
A common use case for KurocoEdge is adding, replacing, or deleting HTTP headers to your site. While this process of changing headers could normally be quite complex to perform, KurocoEdge makes it relatively quick and easy to accomplish by following this tutorial.
In the steps below, we will create a new KurocoEdge rule, with an action targeting an item (in our case a response header), which will be applied to your website on the edge of the network.
What You'll Learn
Adding a New Header
In this first example, we will be create a new 'dummy' header from scratch to demonstrate how this can be done in KurocoEdge. Dummy headers can be useful for testing and verifying that the rules you have created in KurocoEdge are actually being applied to your site as intended.
When you later wish to set actual headers for your site, you will follow these same steps below to achieve the desired result:
To begin, first navigate to 'Deploy List' in the Admin Panel menu, and clone a new draft version to work on.
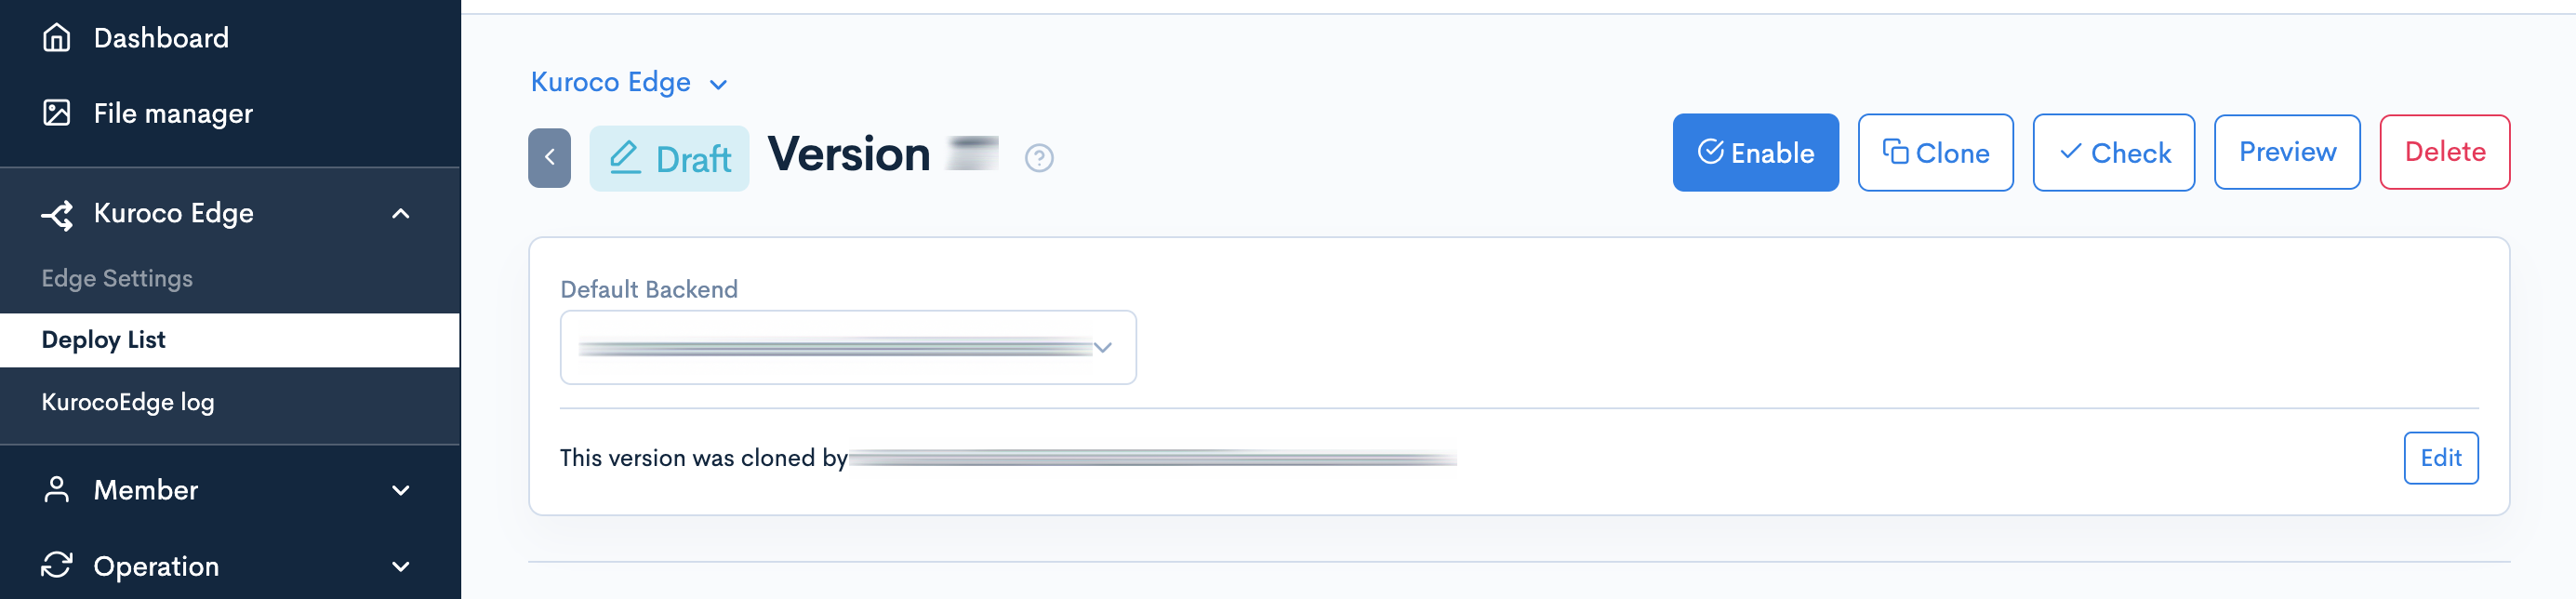
To clone a new draft, first click on the [Version] that is either currently Active, or any version that is a Draft.
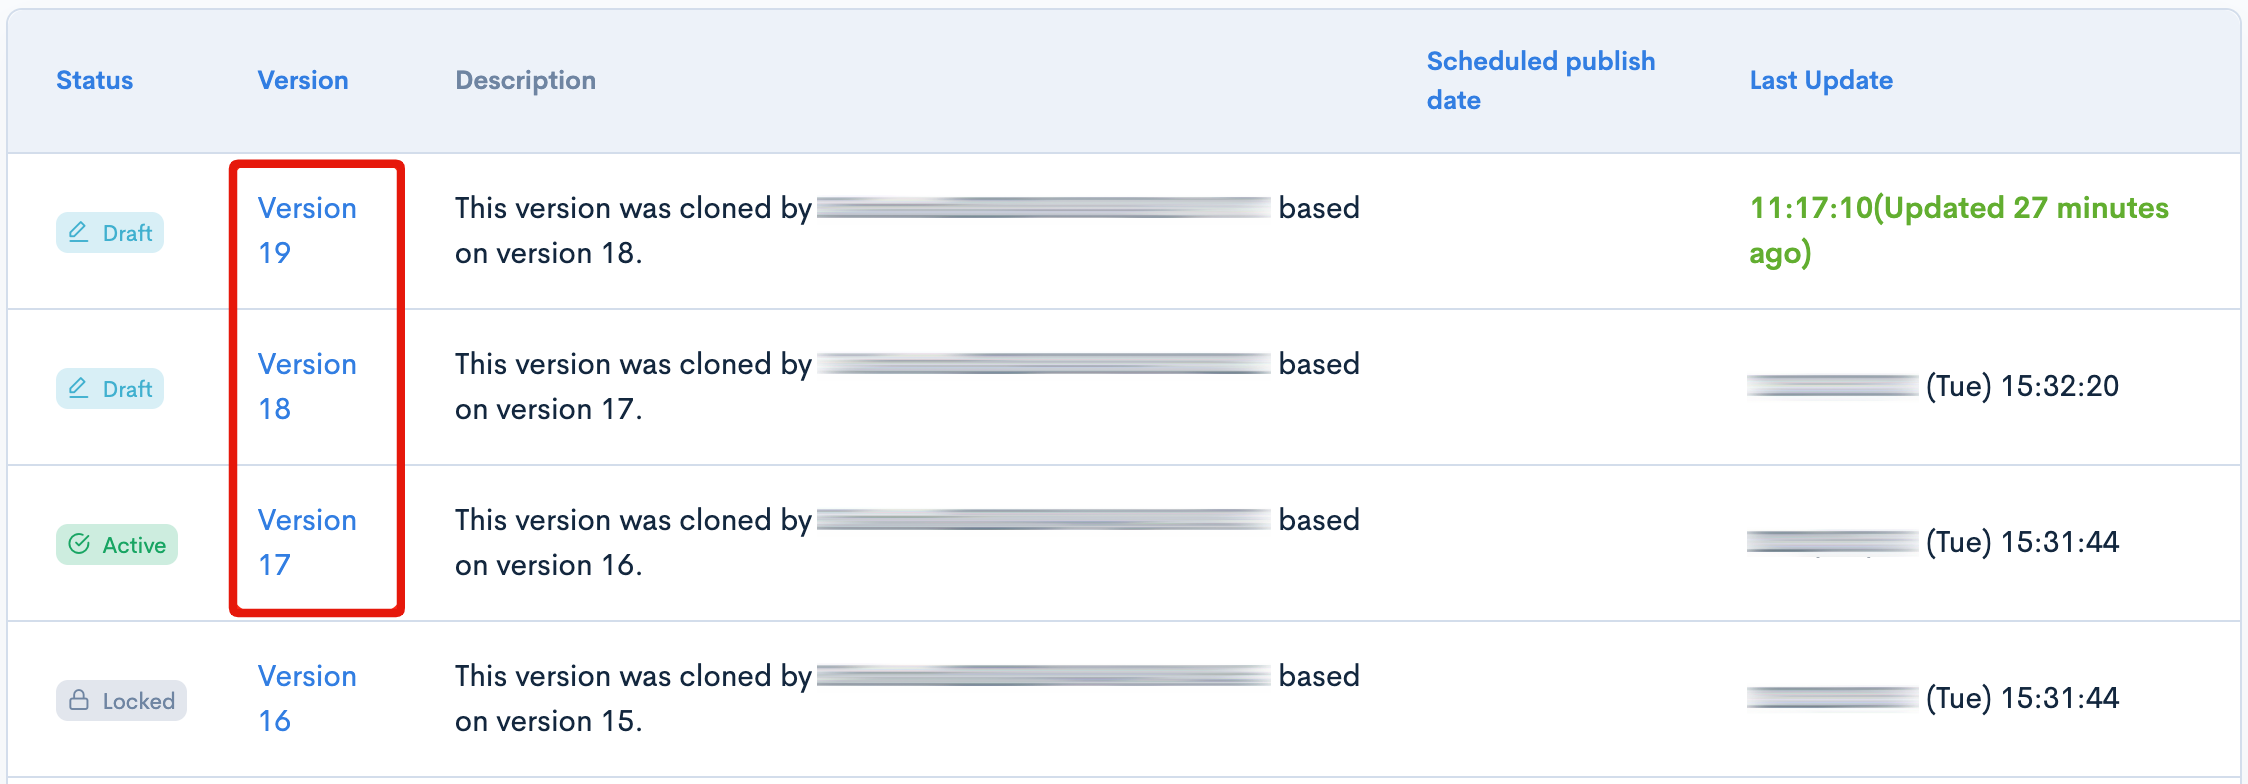
Click [Clone]

or,

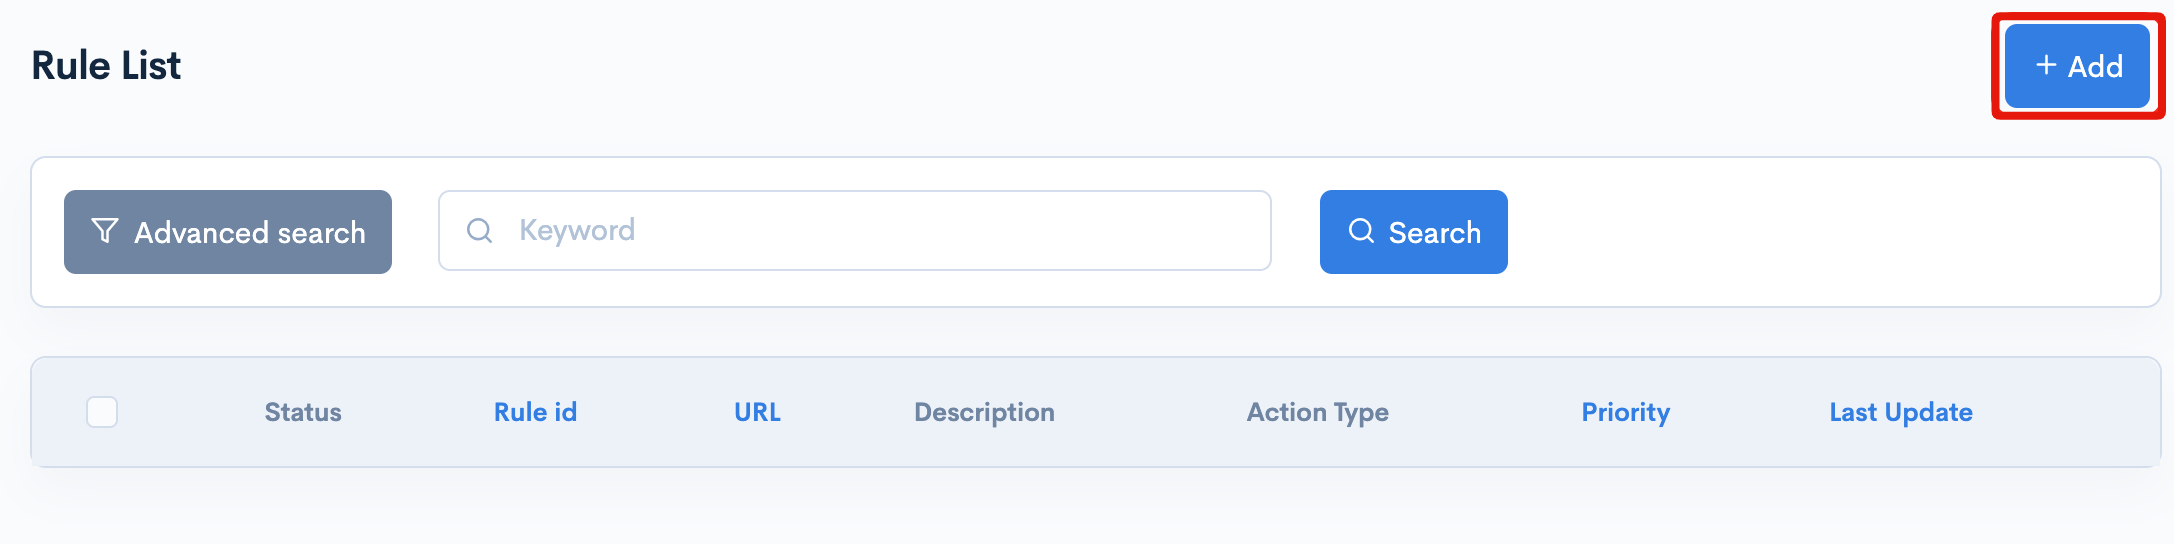
In this newly cloned version, scroll down to the 'Rule List' section on the screen, and click the 'Add' button to create a new rule.
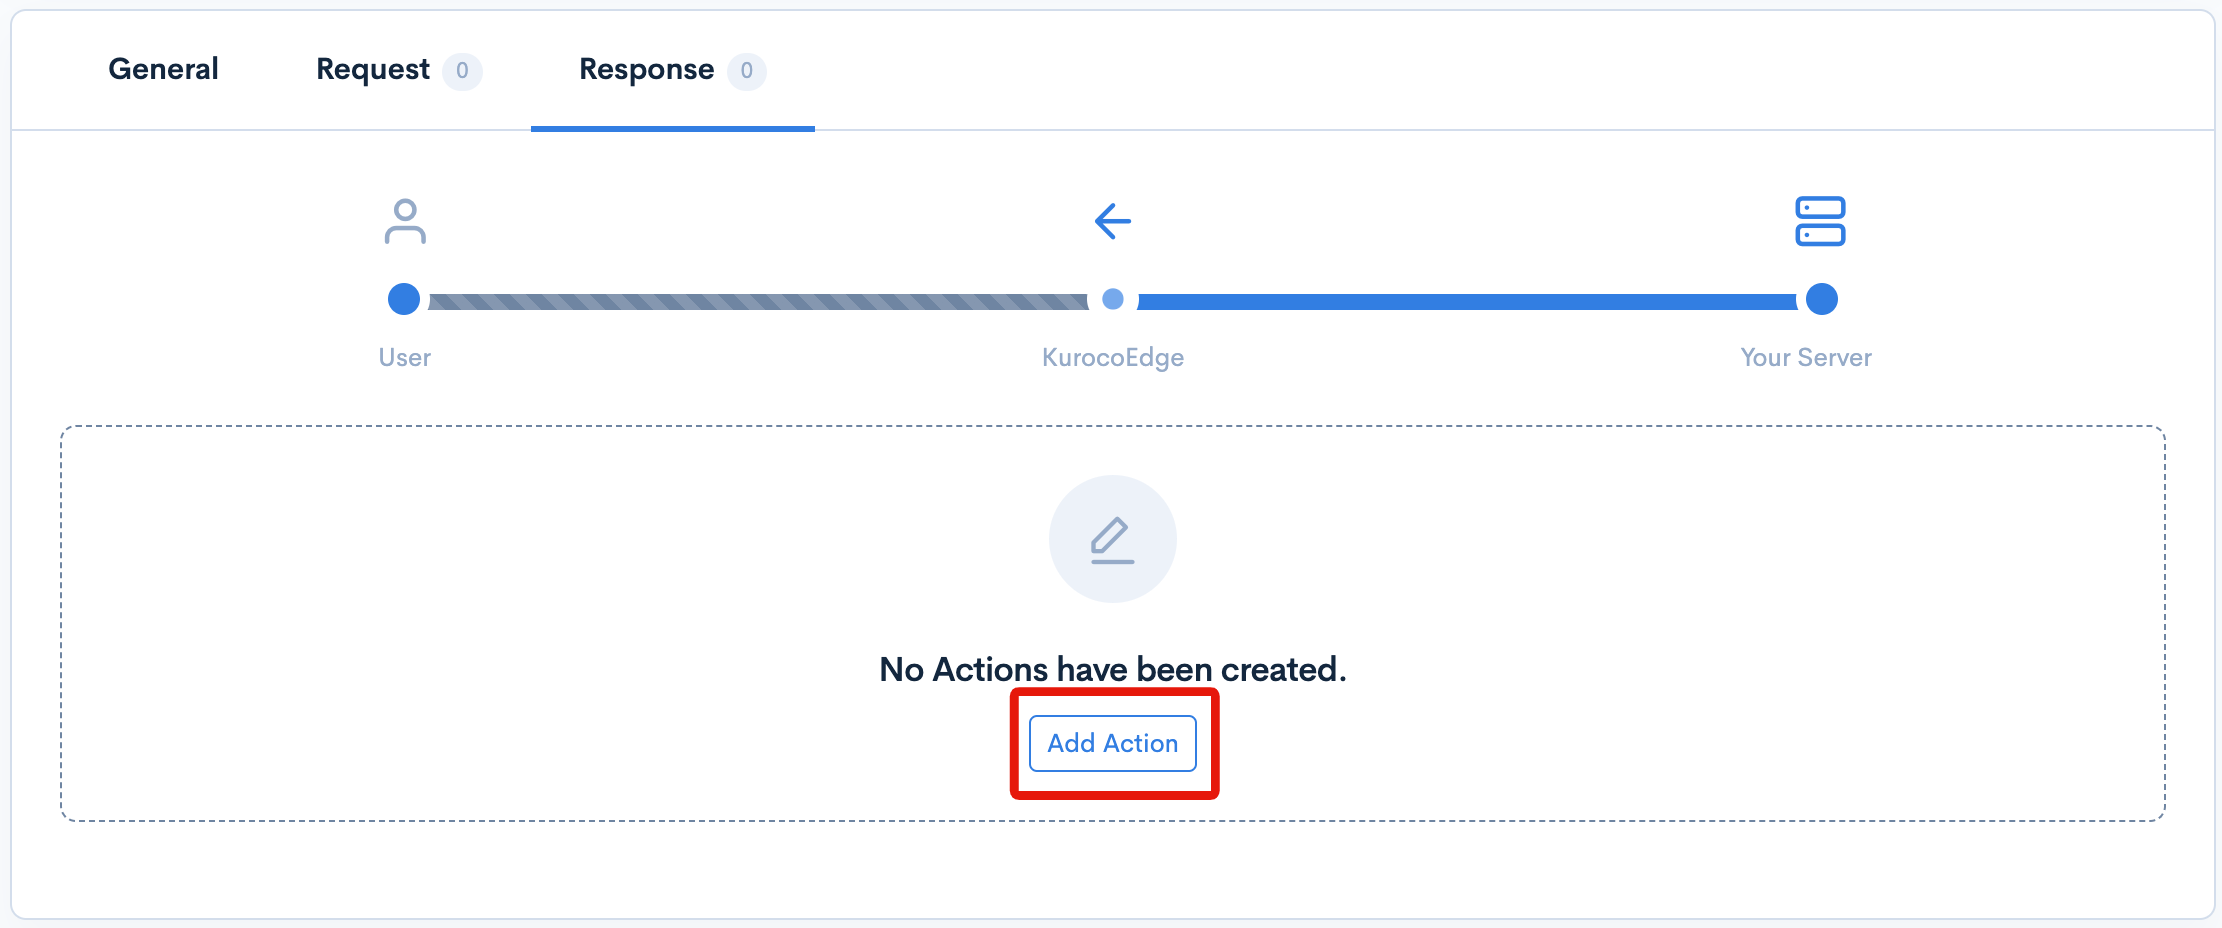
After clicking 'Add', a new screen will appear for creating the new rule. For the sake of this tutorial, click on the 'Response' tab (as we will be creating a new action for this rule that affects the HTTP response header).
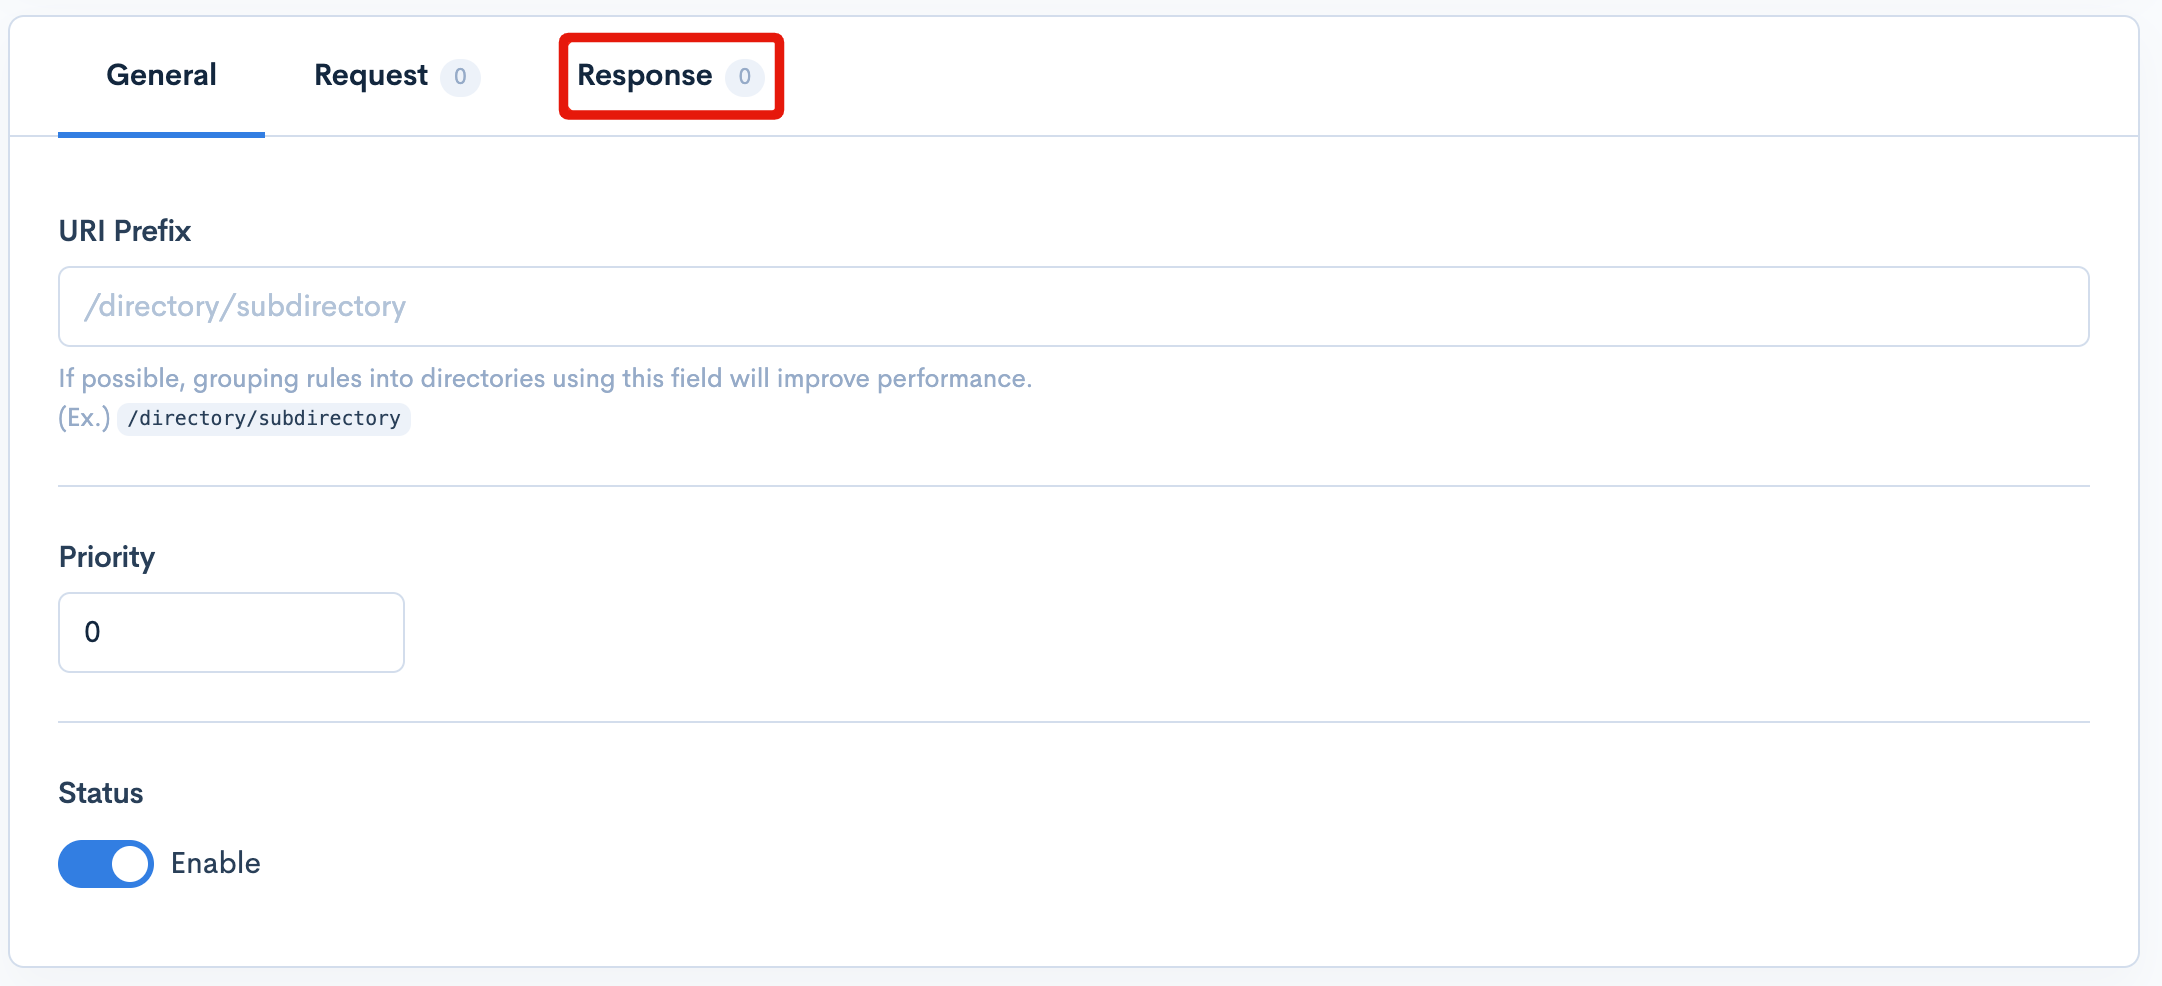 tip
tipIf you wish to instead create an HTTP request header, you can follow the same steps in this tutorial, but instead click on the 'Request' tab in this step.
Next, click the 'Add Action' button to start creating a new Response action that will be applied to this rule.
For this new 'Response' action, you will be given a few additional options, as displayed. For the sake of this tutorial, you can skip straight to the 'Execution' dropdown menu. Click on it to expand it.
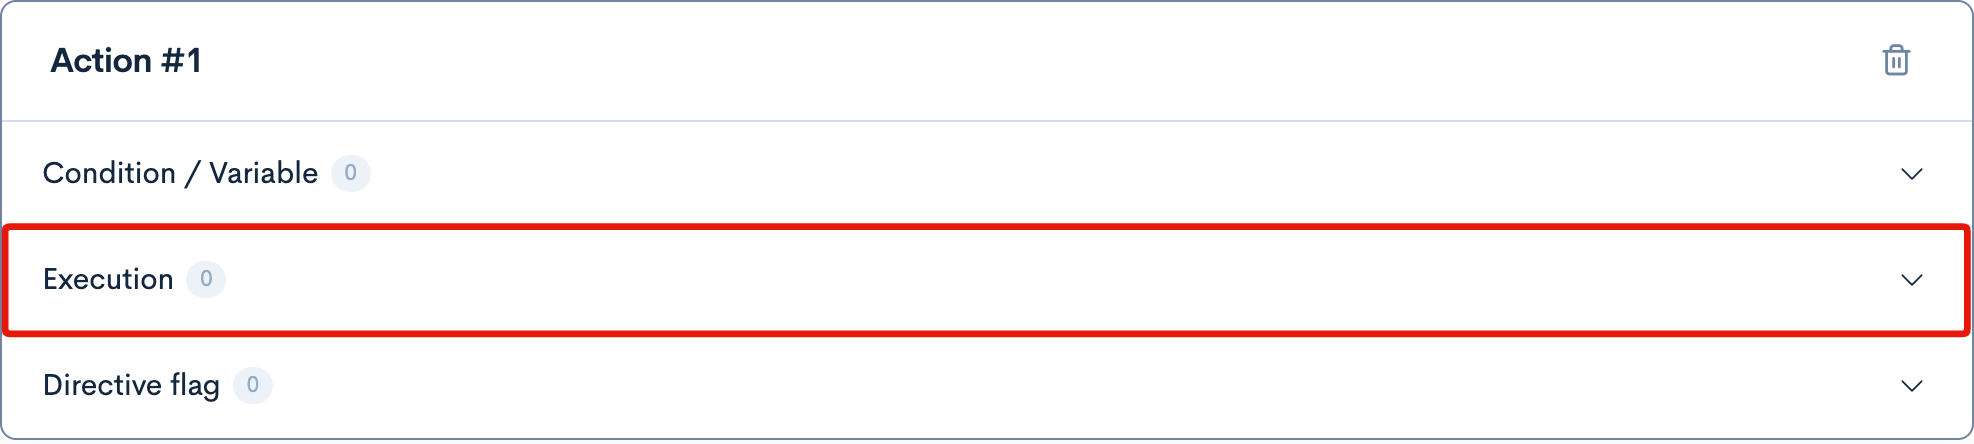
Proceed by clicking the 'Add Item' button, to add a new item to be performed by this action.

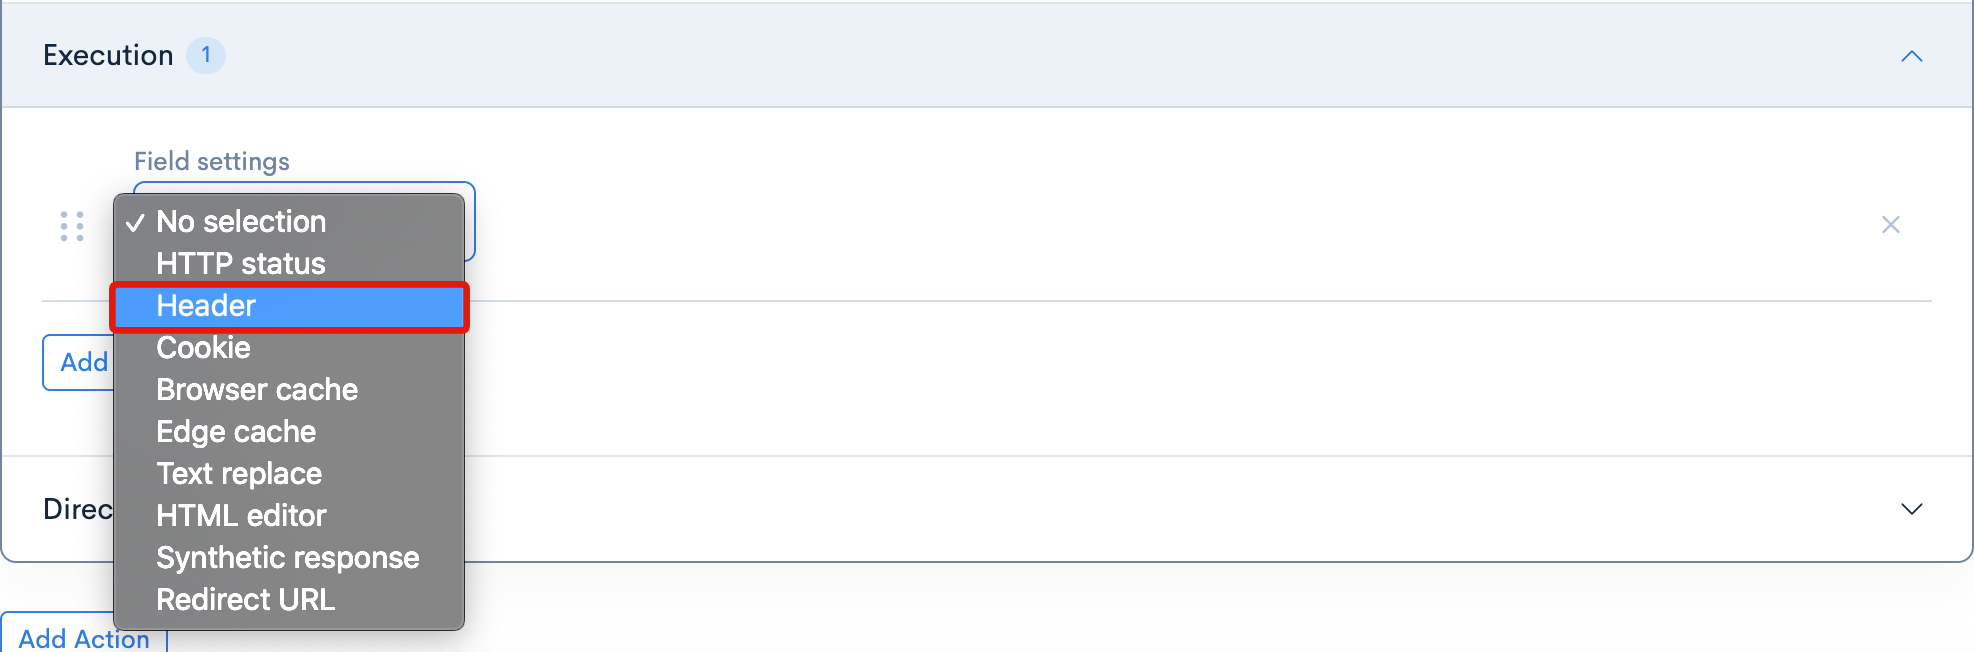
When the new item has been generated, you will have several item option types to select from. For this tutorial, we will be selecting the 'Header' item type - since we will be changing the HTTP response header.
For the 'Operation', we will first leave it as 'Set', to demonstrate how to create a new header from scratch.
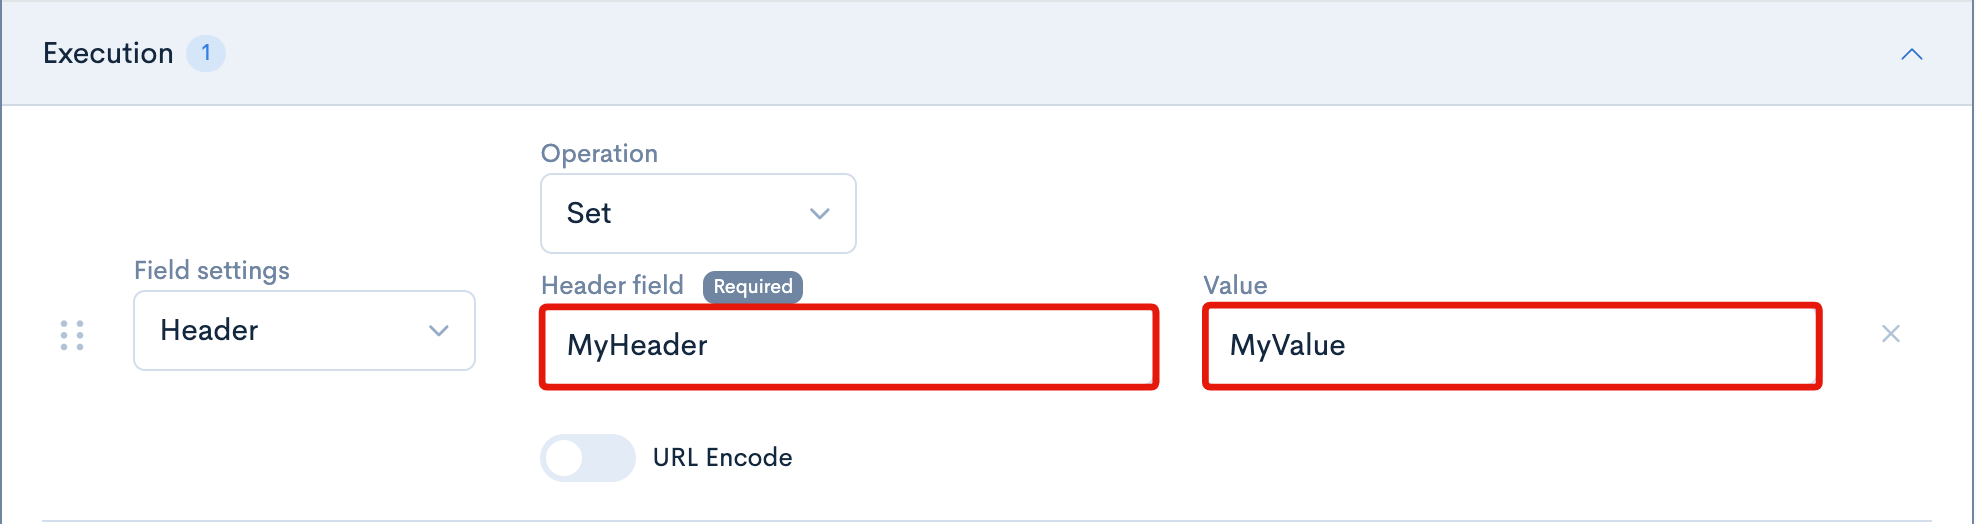
In the 'Name' field you can enter in the name of your new header that you wish to create. If you click on the empty field, a variety of common header types will be auto-generated as suggestions shown in a dropdown field. You can optionally select one of those, but it is not necessary. For the sake of this tutorial, we will be creating our own custom header named
MyHeader.In the 'Value' field, you can enter in the value of your new header. We will be creating a custom header value of
MyValue.tipYou can enter any string into the 'Name' and 'Value' fields. You may wish to use camel case or kebab case, etc. depending on the naming conventions or syntax requirements of your project.
Once you have completed the above steps, you can click on the 'Update' button to finish setting up the action for this rule.

In order to have the rule applied to your site, it is necessary to either open the current 'Draft' version of your site in 'Preview mode' (or alternatively, set it 'Active mode').

Verifying that Your Custom Header Has Been Added
To confirm that your new header - from our first example above - is appearing on your site, you will need to open your site in a new tab or window in your browser, and open up a developer console. For the purposes of this tutorial, we are using the Inspect function in the Chrome browser (simply right-click anywhere on the page to click on it and open the development console).
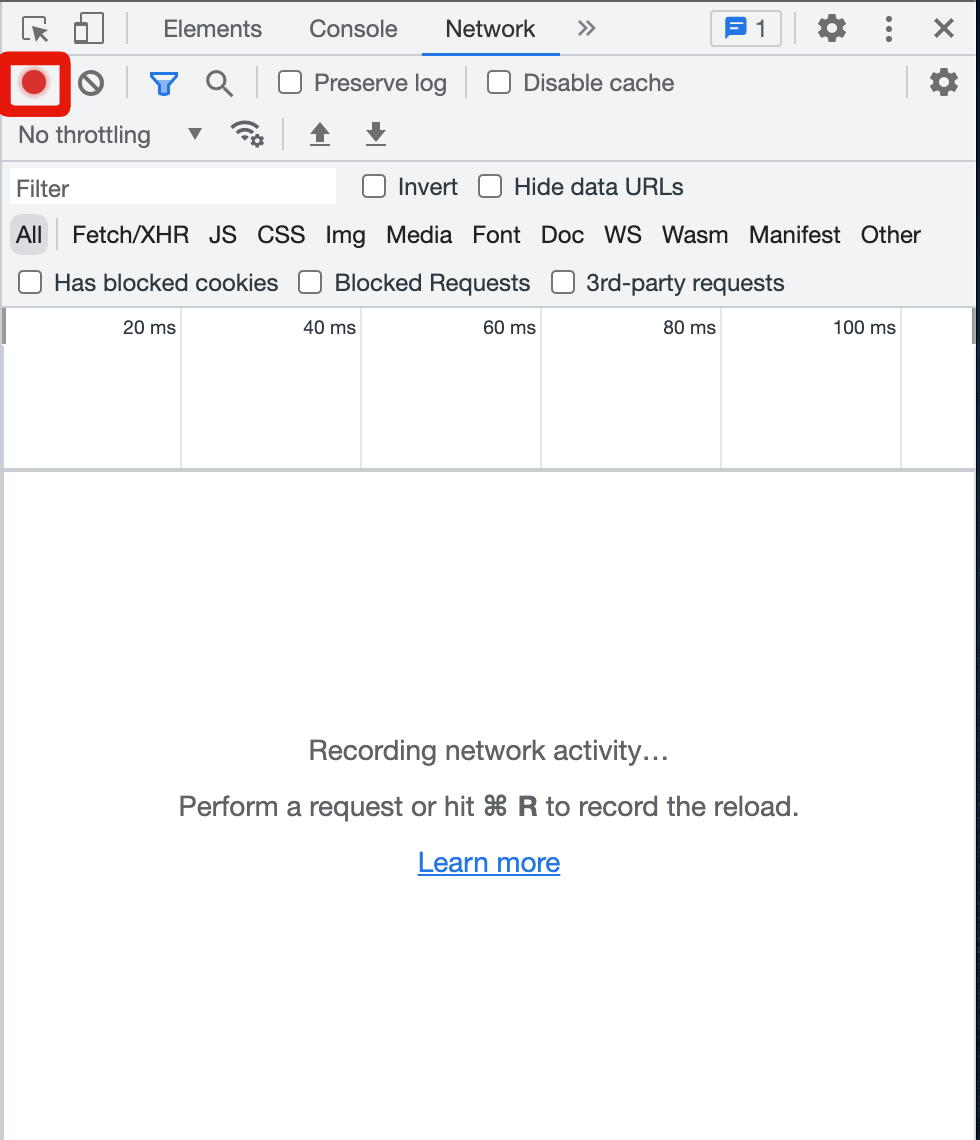
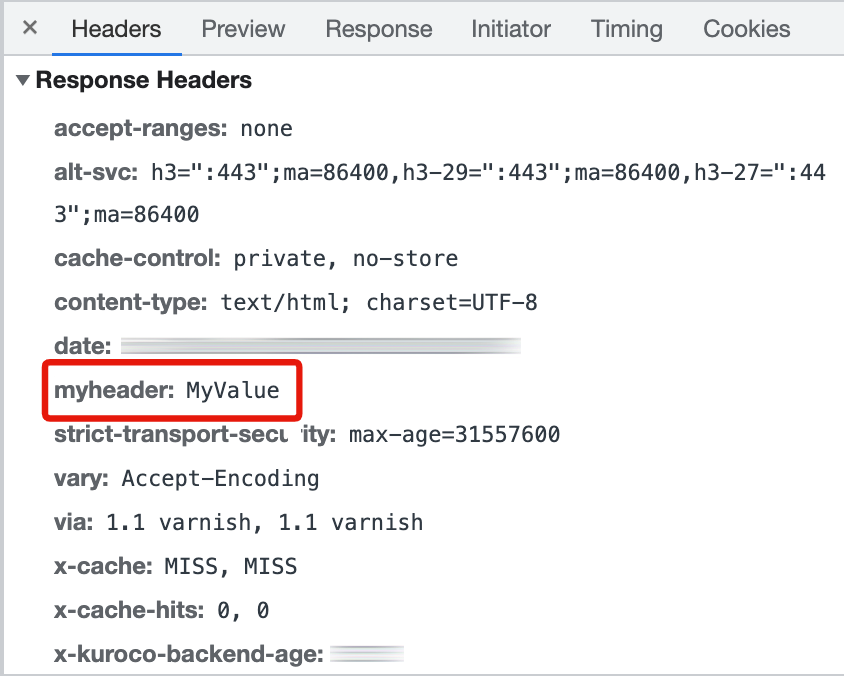
When the development console is open on the page, click on the Network tab. Ensure that the 'record' button is active (red colored, as shown in the image below), the Refresh your page to record the network activity - this will include HTTP requests and responses, as well as the headers they contain.
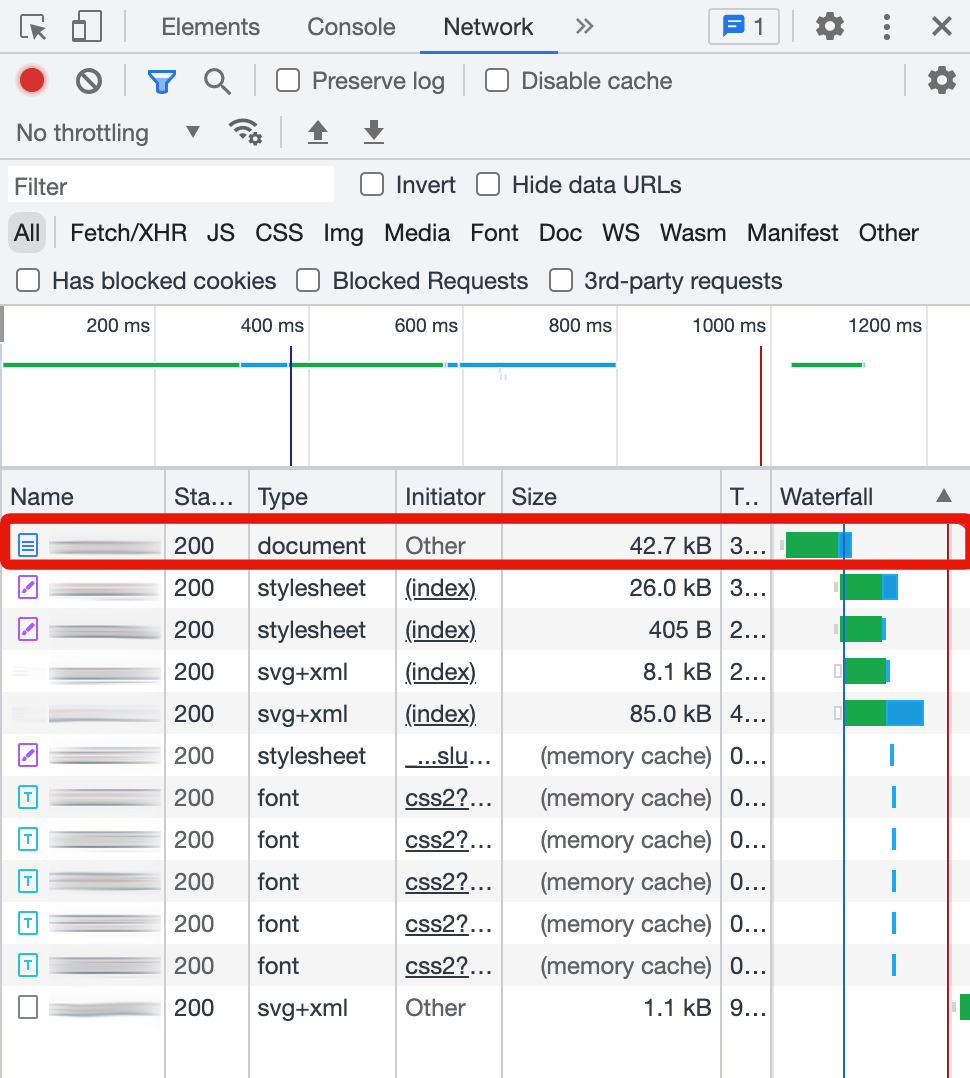
Once the files of your website have loaded, you can click to select them. Click on the main document of your site, as shown in the image below.
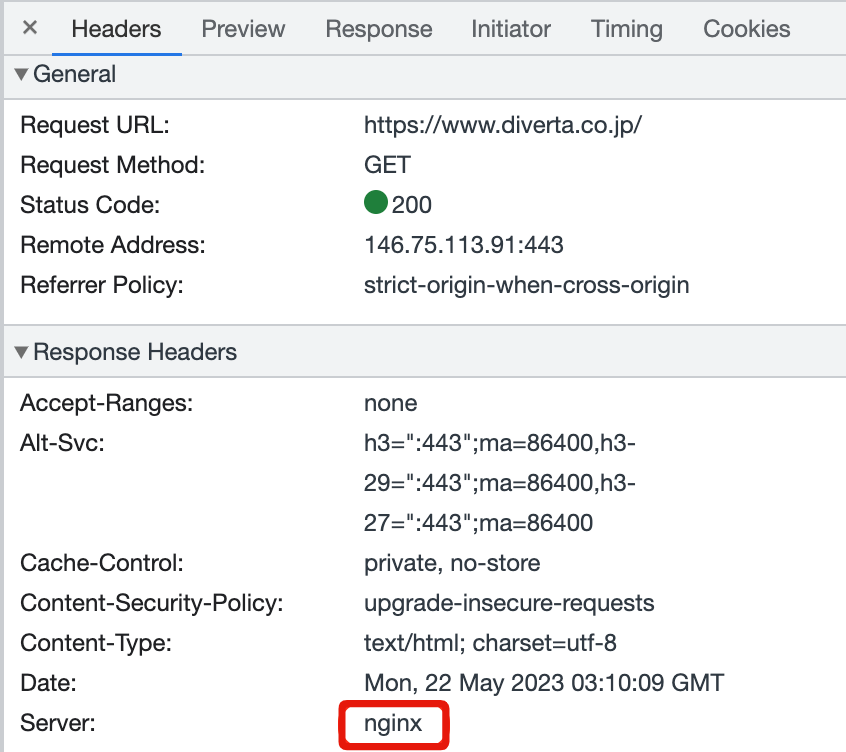
Finally, click on the 'Headers' tab, as shown above, and scroll to find your custom header that you created in KurocoEdge earlier. In our first example, we created the MyHeader header with a value of MyValue - which we can clearly see in our screenshot. This confirms that our custom header is being generated in the HTTP responses for our site.

Replacing an Existing Headers
After following steps 1-8 above, instead of selecting 'Set', which creates a new header from scratch, you can instead select the 'Match & Replace' option. This option is meant to essentially 'find/replace' the value of an existing header, without replacing the original name of the header itself.
Simple Replacement
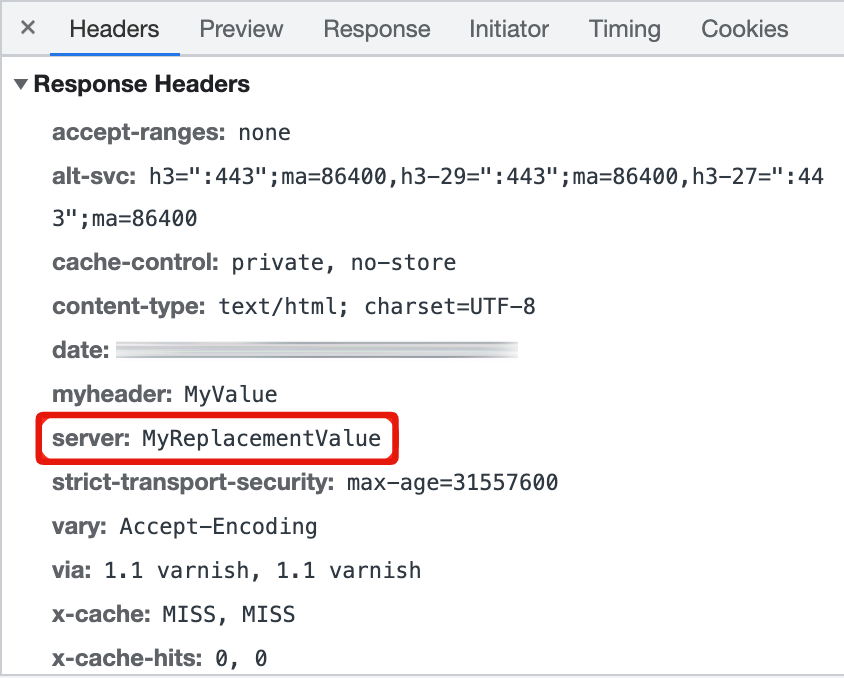
Before proceeding with a 'Match & Replace' method, confirm the current default value of the header you will be replacing. In the example below, we will replace the 'Server' header value. This value is displayed in browser's developer console window:
To simply replace the existing default value with a new value, you can enter in the exact string value of the current header into the 'Match Pattern' field, and enter in the replacement value into the Value field.
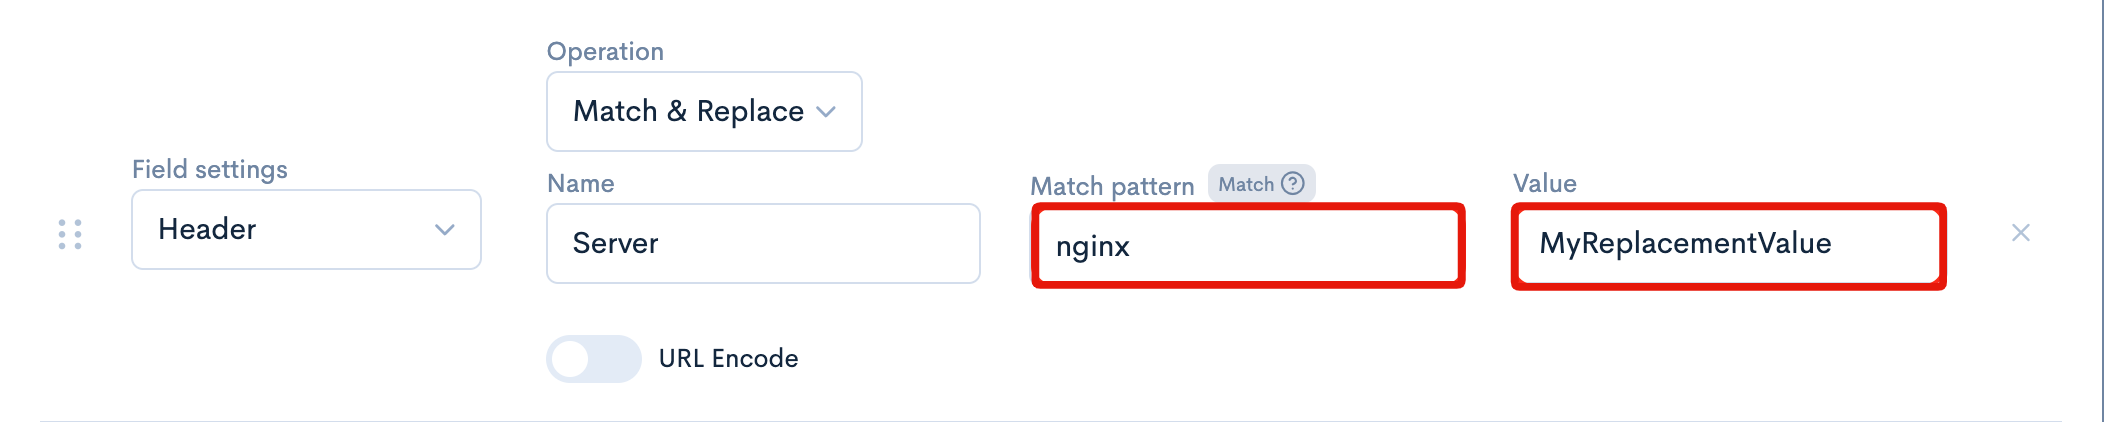
In the example in the above screenshot, the current value of nginx will be replaced by the new value of MyReplacementValue. After clicking the 'Update' button and inspecting your site in the browser in preview mode, you will see the updated header value.
Advanced Replacements Using Regex
For more advanced use cases, you can use regular expressions in the 'Match Pattern' field. For best results, this will require technical knowledge of how regex works.
Here are a few examples of how this could work:
| Example | Name | Pattern | Value | Result |
|---|---|---|---|---|
Replace Location value (containing page redirects URL) in header | Location | www\.original-domain\.com | www.new-domain.com | www.new-domain.com |
| PasalCase to single-byte spaced words | MyServerName | ([a-z]) | [ $1] | My Server Name |
| Replace single-byte spaces with hyphens | my server name | ([ ]) | -$1 | my-server-name |
| Replace spaces with dots | my server name | ([ ]) | .$1 | my.server.name |
| Place square brackets around characters | dataObj0 | ([0]) | [$1] | dataObj[0] |
Note the single-byte space before the $1 variable within the square brackets of the value in the first example above.
Essentially, you can make whichever changes you want using the proper regex patterns. However, there are currently some limitations (resulting from the Rust language's regex engine). For example, converting PascalCase or camelCase strings to kebab-case is not currently possible.
Deleting an Existing Header
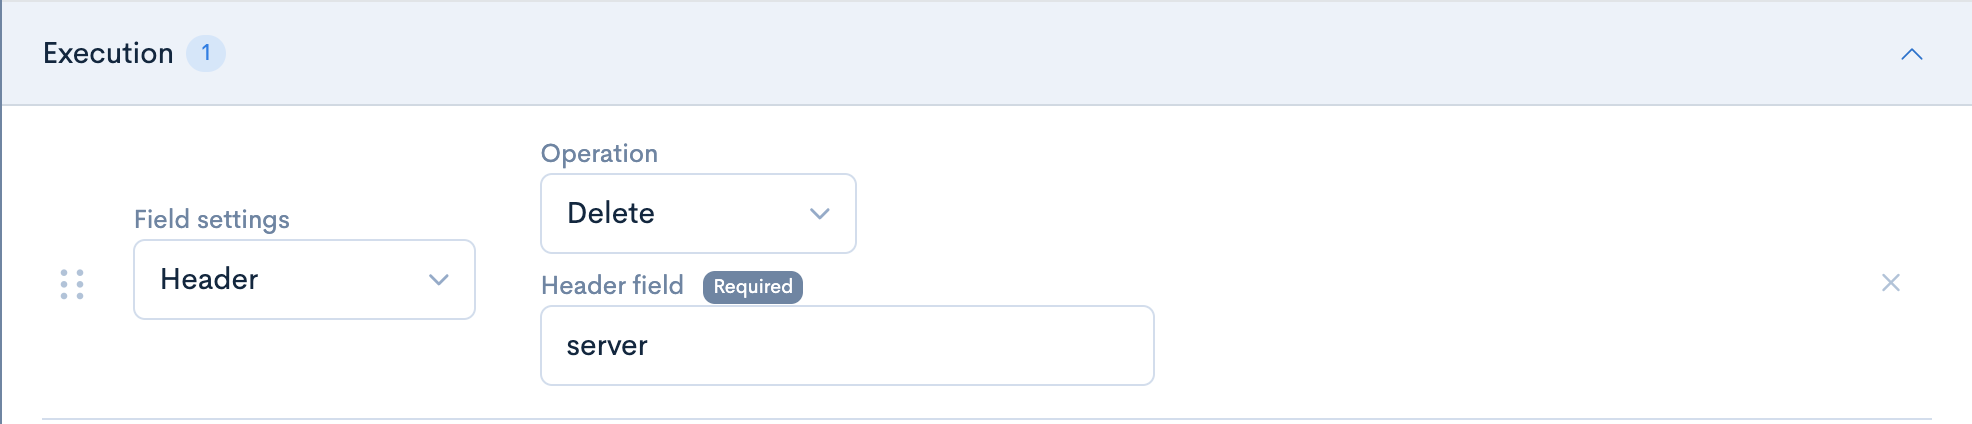
After following steps 1-8 above, instead of selecting 'Set', you can instead select the 'Delete' option. Entering in the exact name (string) of the existing header you wish to delete, updating the action, and then enabling the rule you have set up will cause that header (in this case the 'server' header) to be removed.
Deleting headers from your site can cause breaking changes while the rule is in effect. Please proceed with caution, and only if you are certain that you want the 'delete' operation to be performed._
Conclusion
This tutorial walked you through the steps required to add, replace, or delete HTTP response headers for your site. Typically, you may wish to instead use real headers (either adding new ones, or replacing existing ones, depending on your needs). However, dummy headers like the ones we created in this tutorial are also useful for testing the setup process, and verifying whether your KurocoEdge rules are being applied as intended.
When you wish to add, replace, or delete real headers in the future, you can follow the same steps as above to achieve that result.
Support
If you have any other questions, please contact us or check out Our Discord Community.