How to Remove HTML Elements Using HTML Edit
Overview
One of the main benefits of KurocoEdge is that you can make changest to HTML tags 'on the edge', without having to make any changes to your site's source code – or even make changes to any content in a CMS you may be using.
This tutorial explains how to easily remove HTML elements, using KurocoEdge's built-in 'HTML edit' functionality.
What You'll Learn
You can remove HTML elements in KurocoEdge by following the steps below:
- Select an HTML Element to Remove
- Create a Rule to Remove an HTML Element
- Confirm the Element Has Been Removed
Select an HTML Element to Remove
Before you begin setting up the new rule in KurocoEdge, confirm which HTML element(s) on your site you wish to remove. To do this, you will need to identify a CSS selector corresponding to that element.
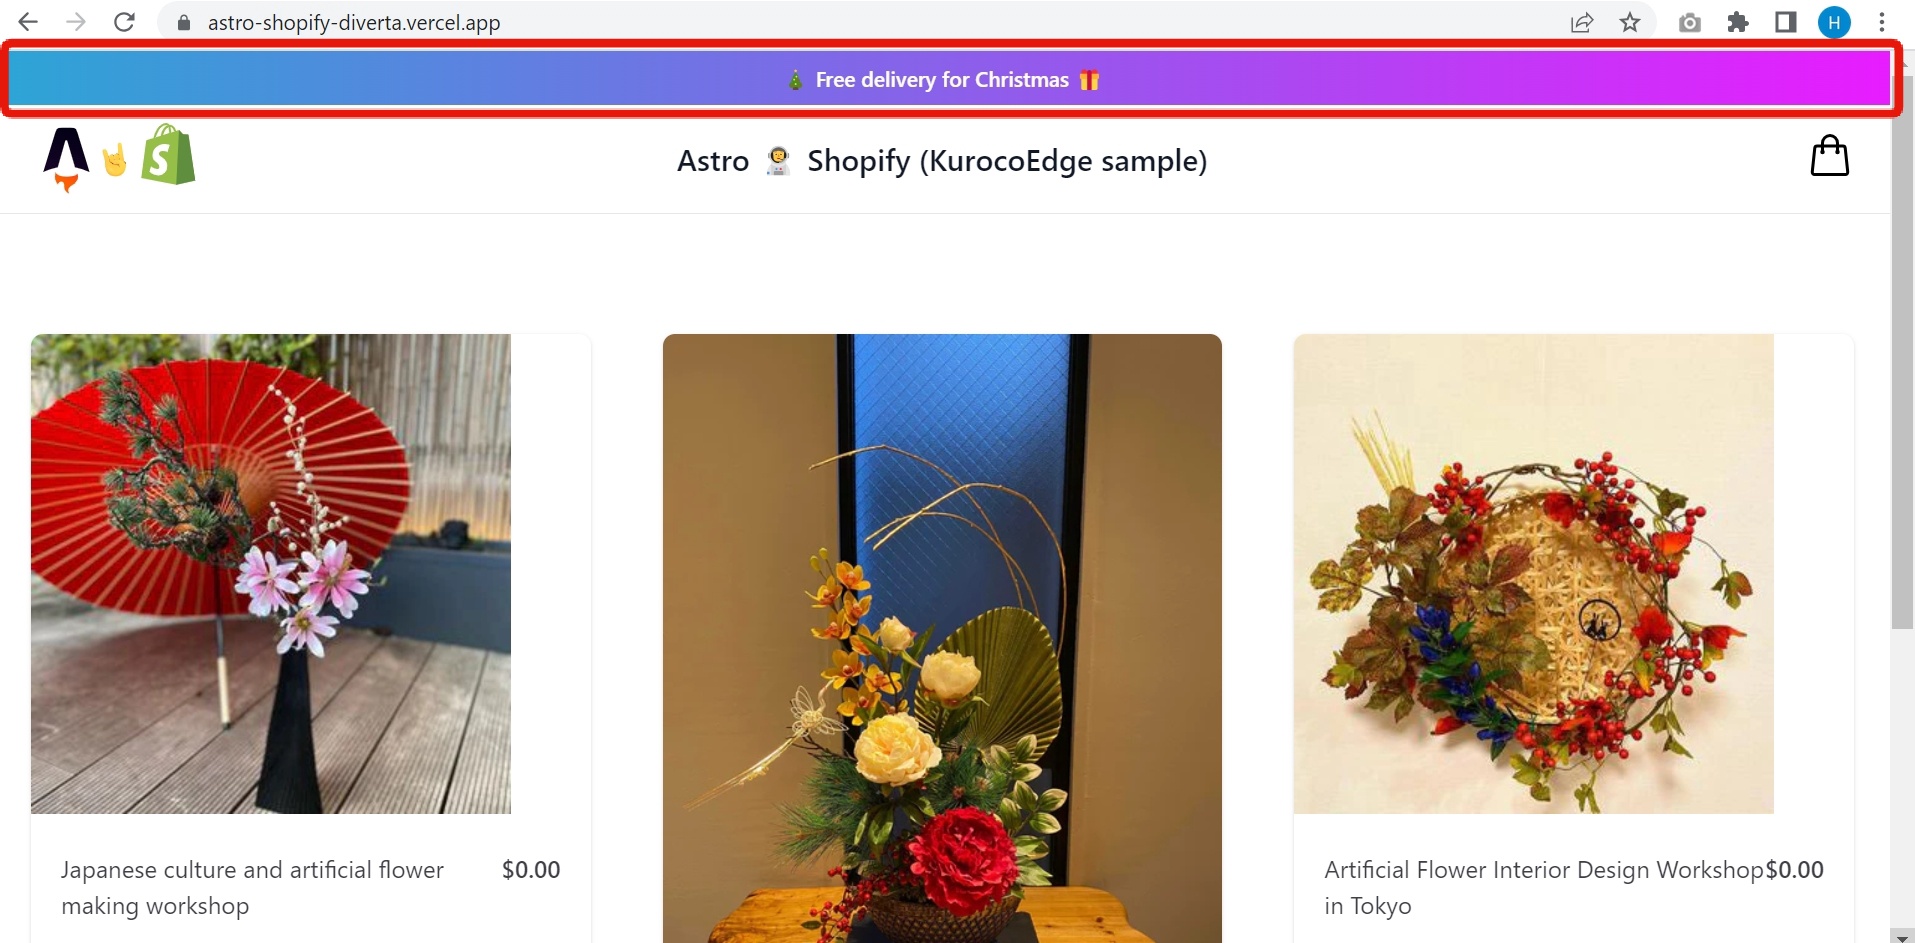
As an example, let's remove the "Free delivery for Christmas" element from https://astro-shopify-diverta.vercel.app/.
To learn more about CSS selectors, visit this link at MDN
While it is possible to target multiple elements using the same CSS selector(s), this can more complicated to keep track of. For the sake of simplicity in this tutorial we will target a single element with a unique CSS selector class.
To choose a CSS selector, when viewing your site in the browser, right-click on the page and click 'View Page Source'. This will display the HTML code of your page. Within the HTML tags on the page you will see any inline CSS selectors, such ids or classes:
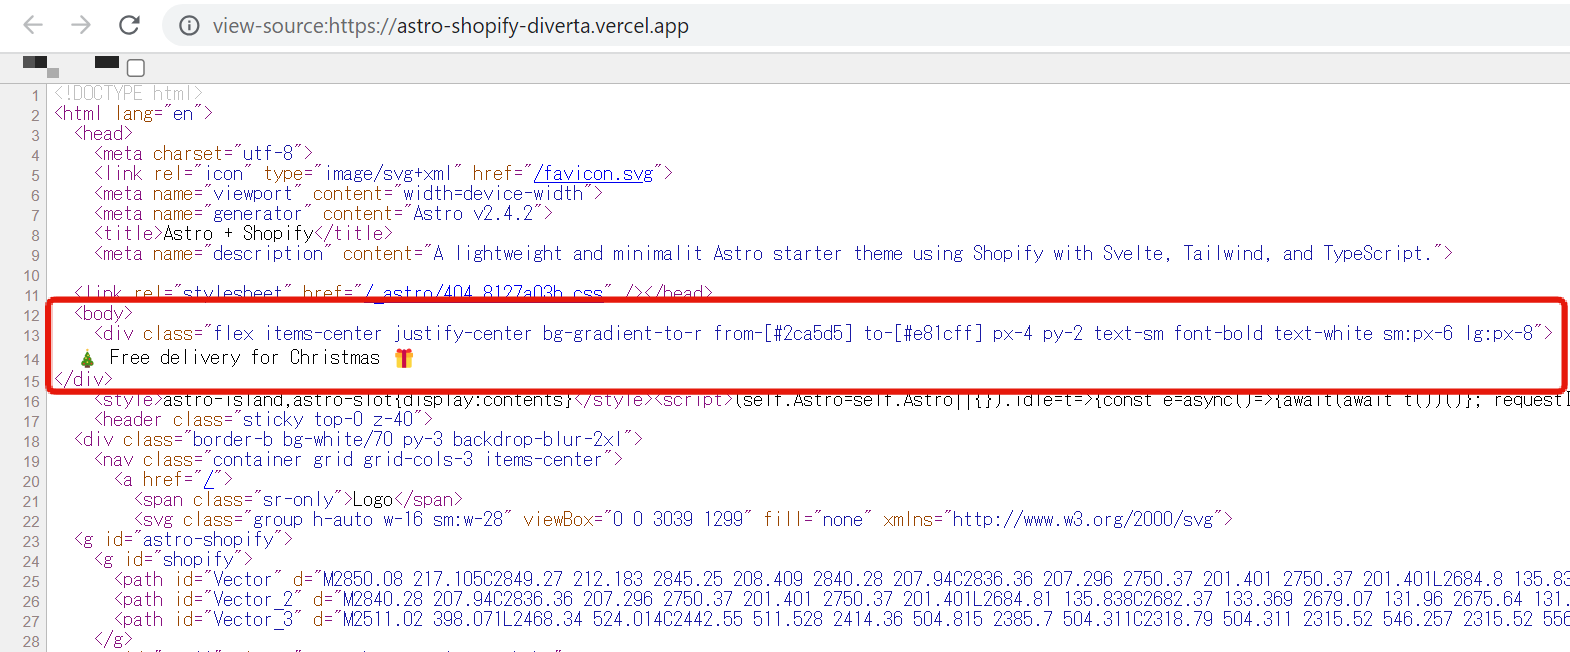
In the screenshot above, we want to select the body > div. Later, we will paste this value into KurocoEdge.
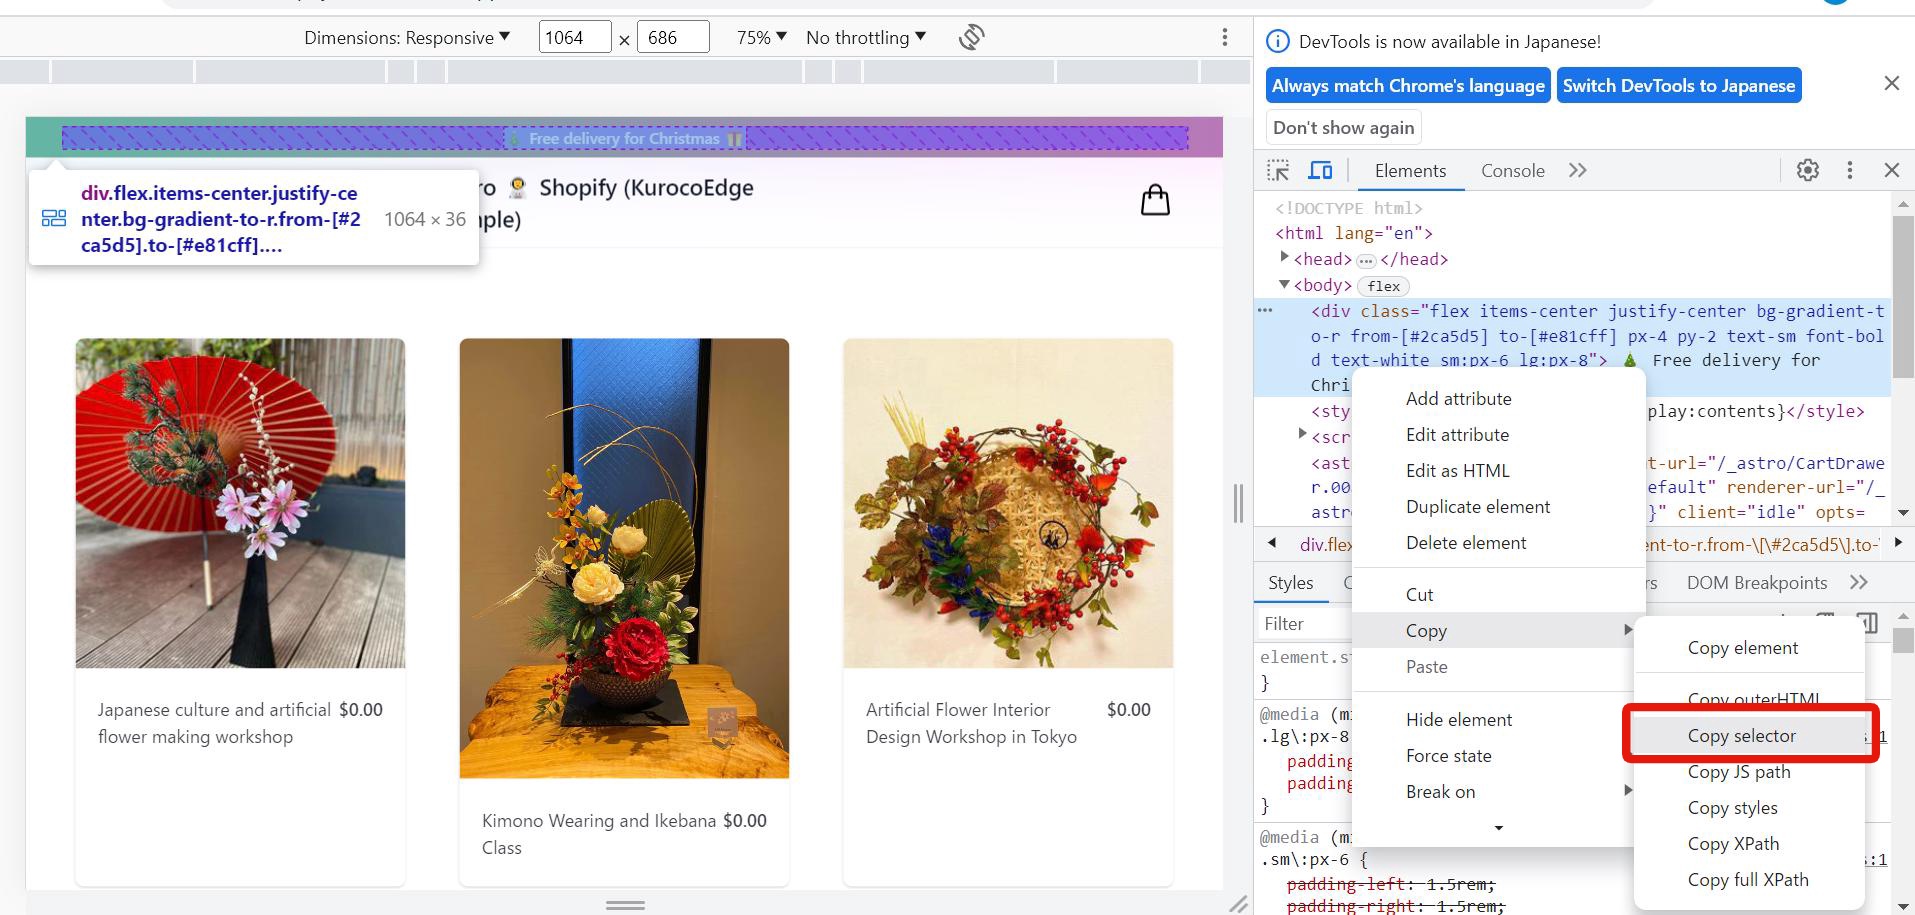
You can also open the Developer Tools and right-click on the target element -> Copy -> Copy selector to copy the CSS selector.
Create a Rule to Remove an HTML Element
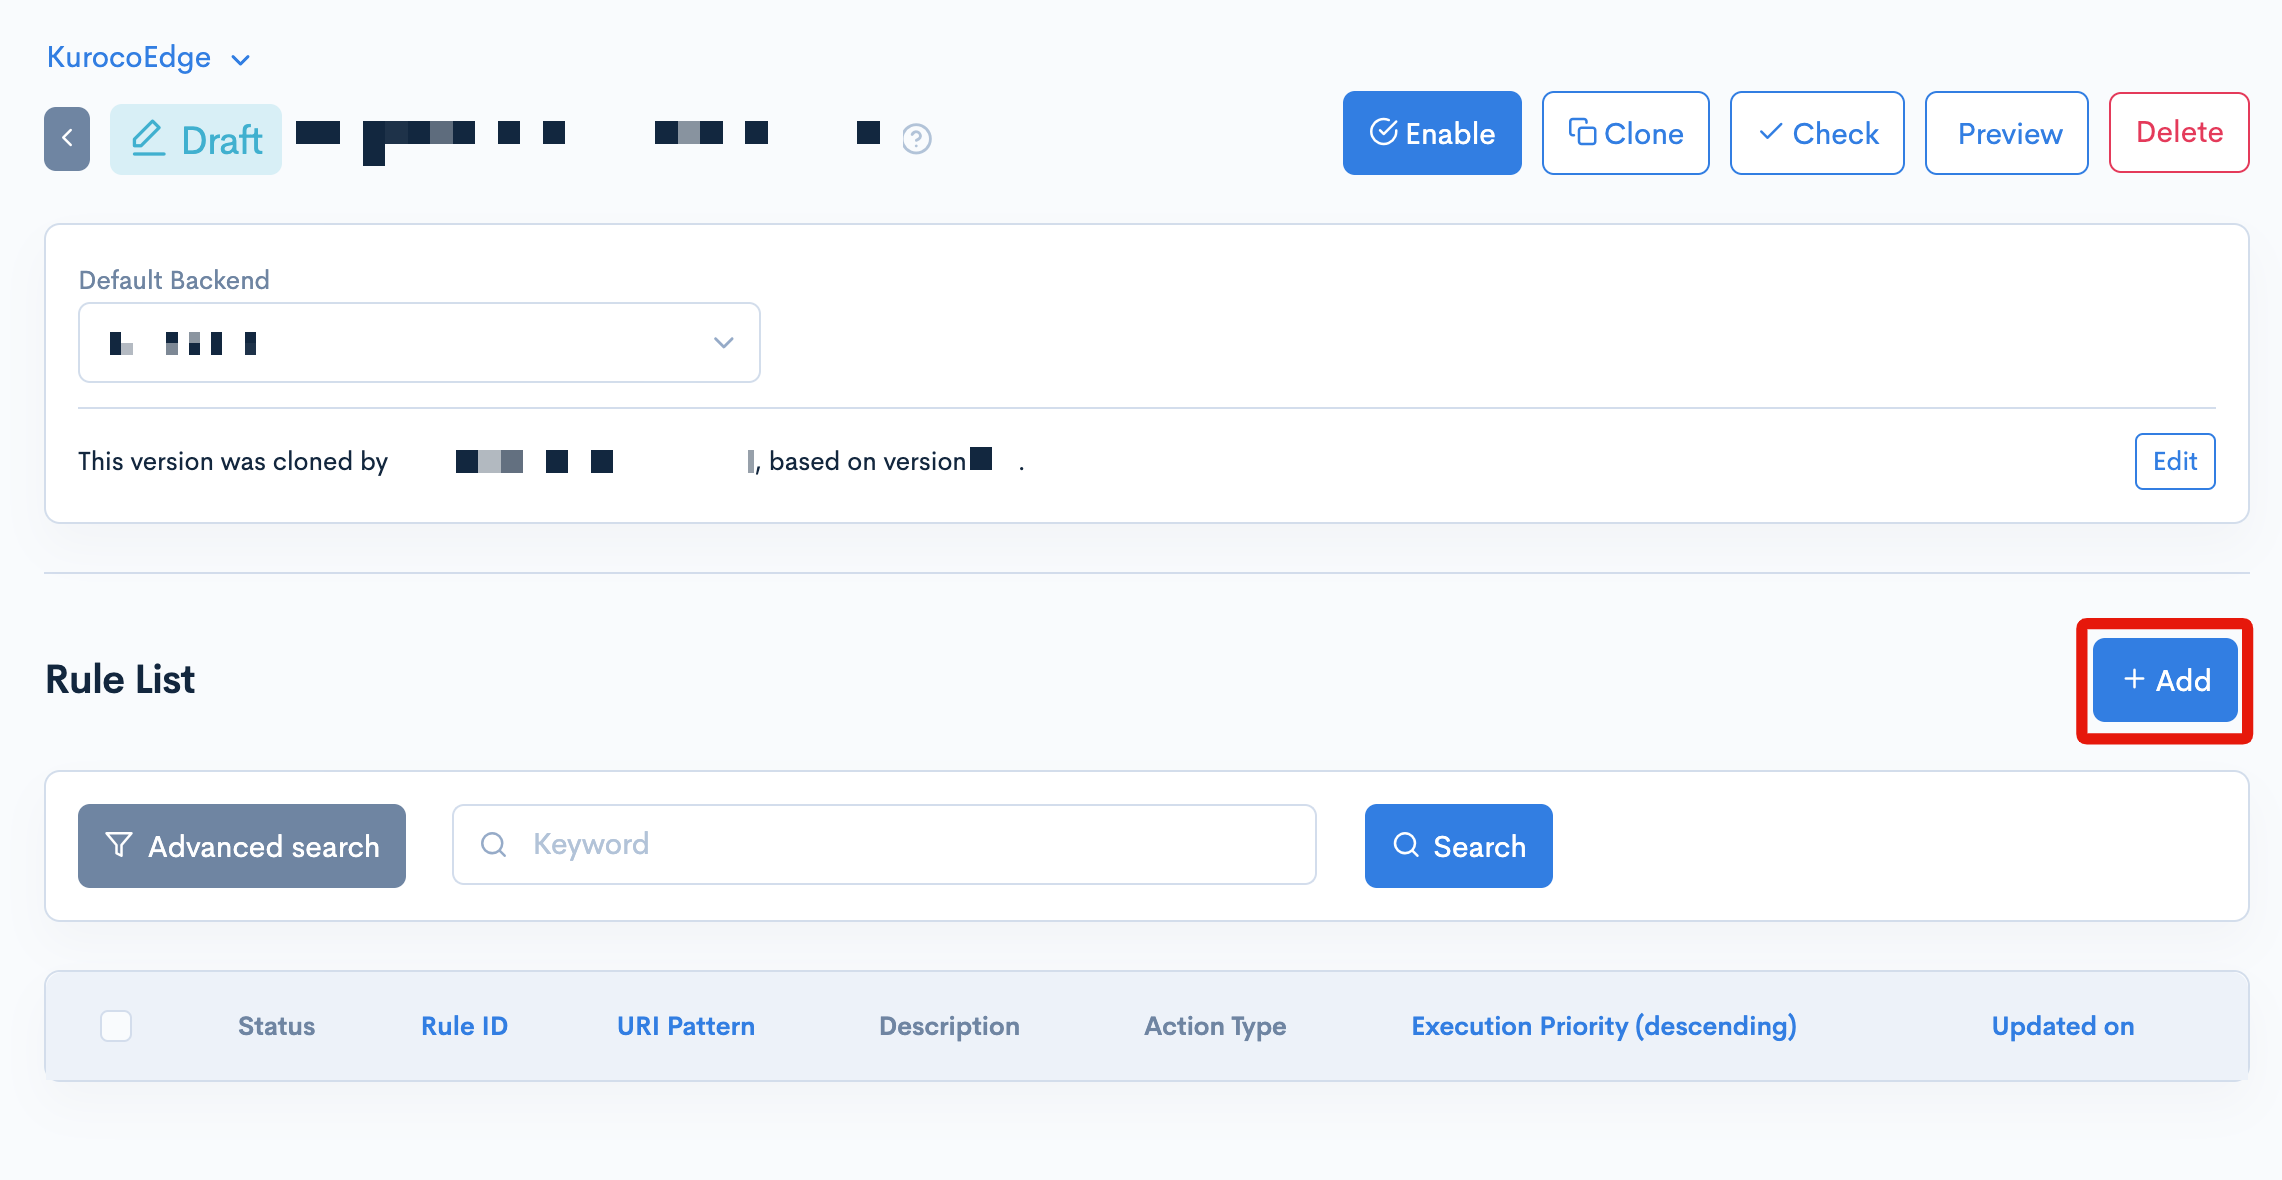
Back in KurocoEdge, within an editable draft deployment version of your site, begin by clicking the [+Add] button in the 'Rules List' section to create a new rule:
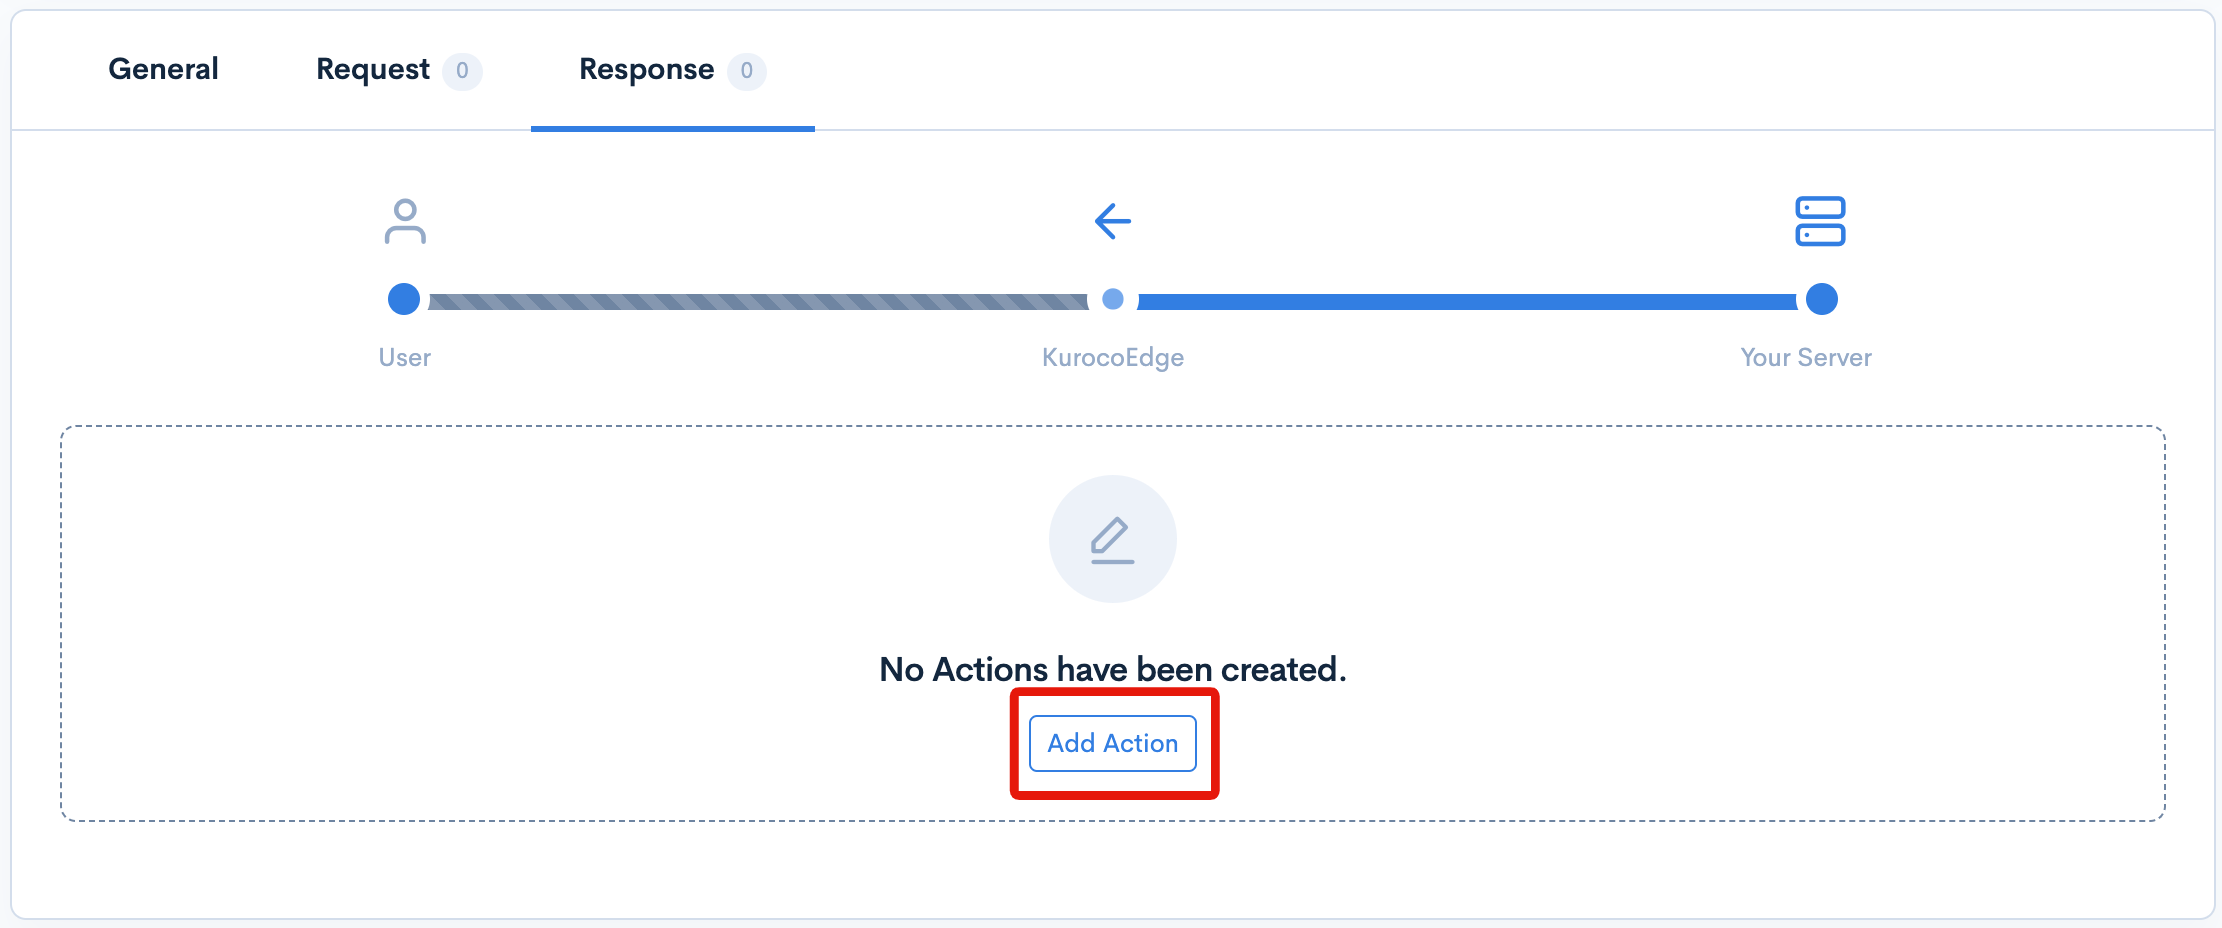
Click on rule's the 'Response' tab, then click the [Add Action] button to create a new action.
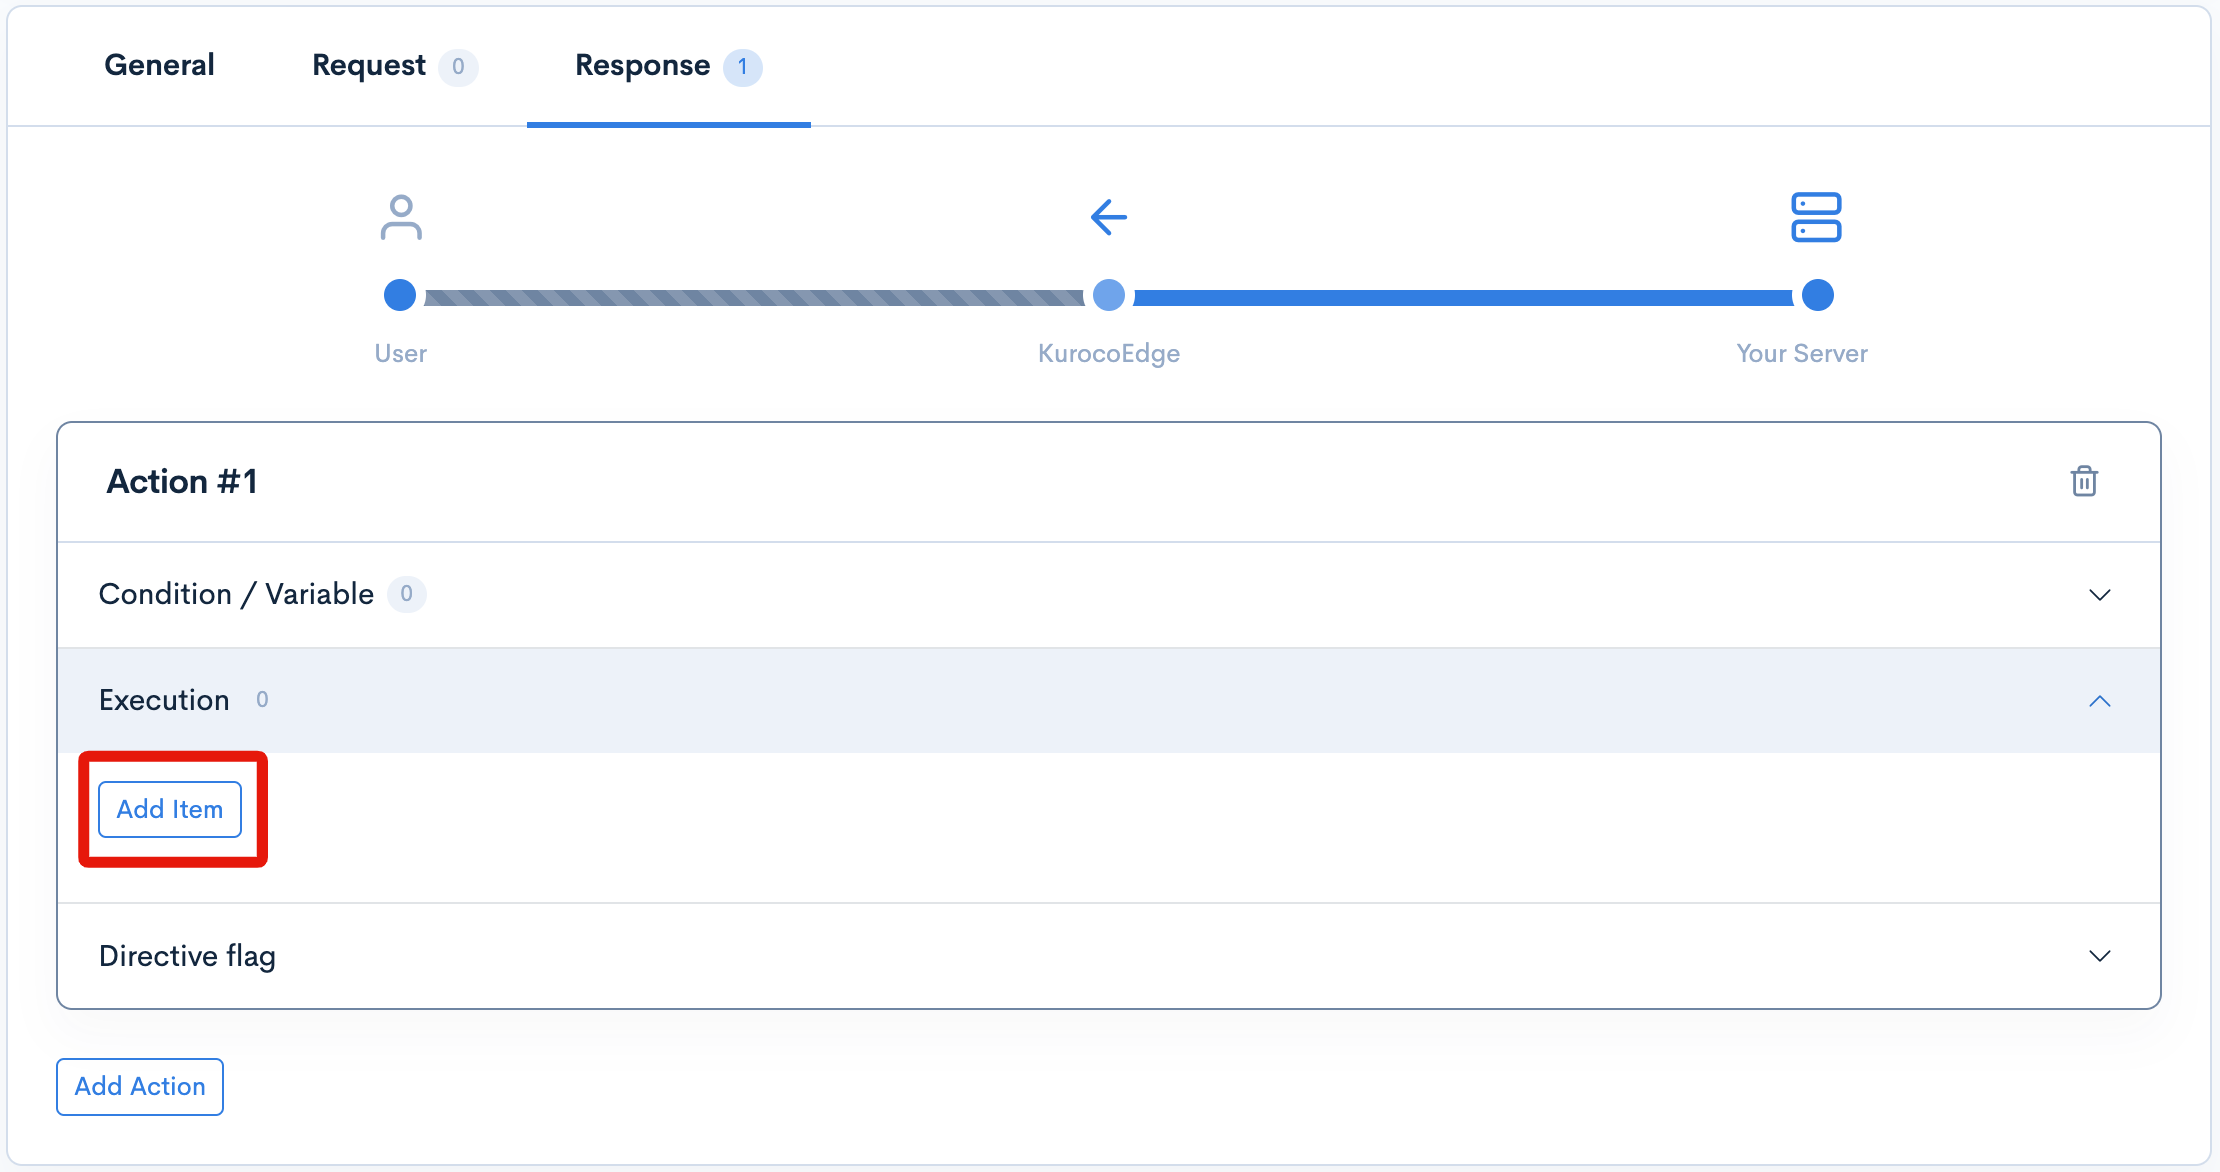
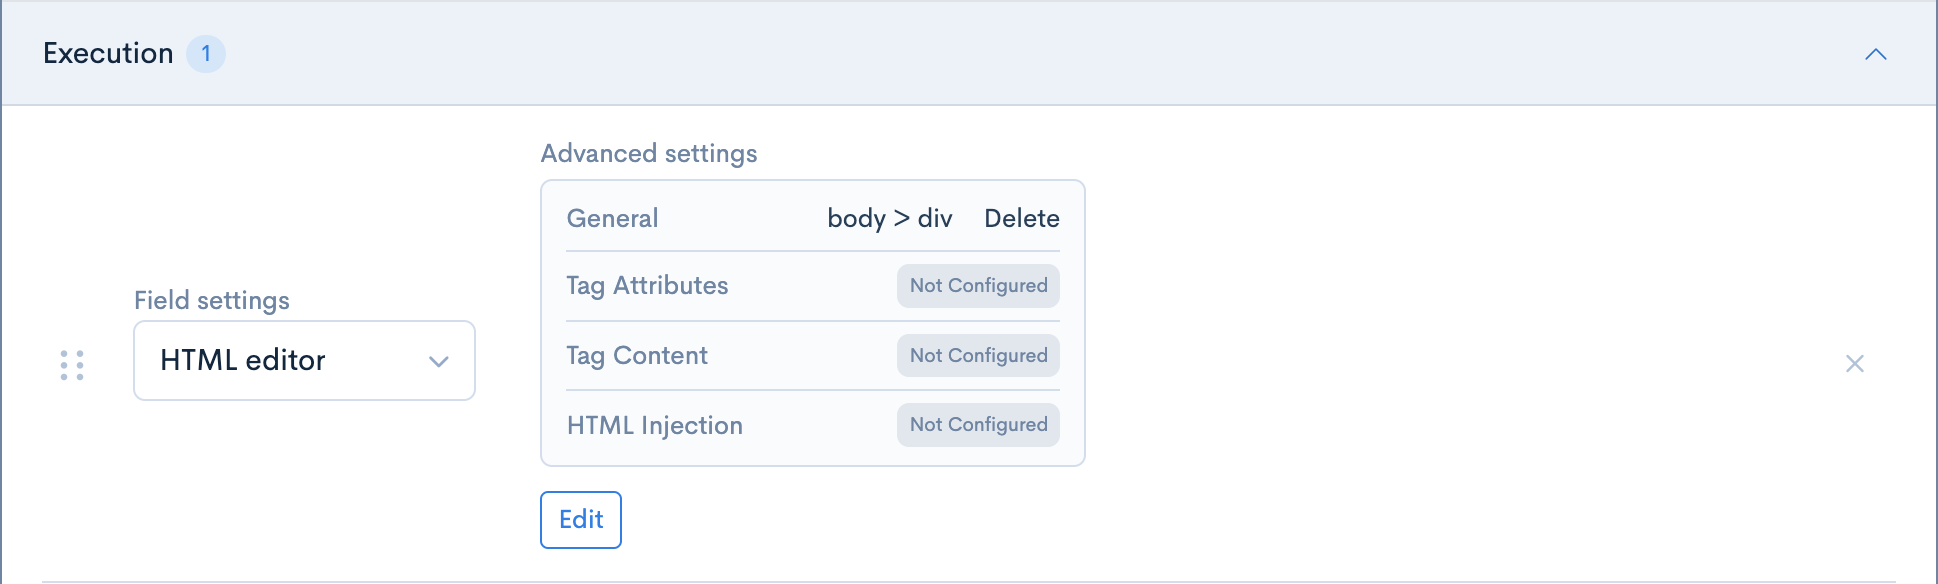
Within the 'Execution' dropdown menu click the [Add item] button:
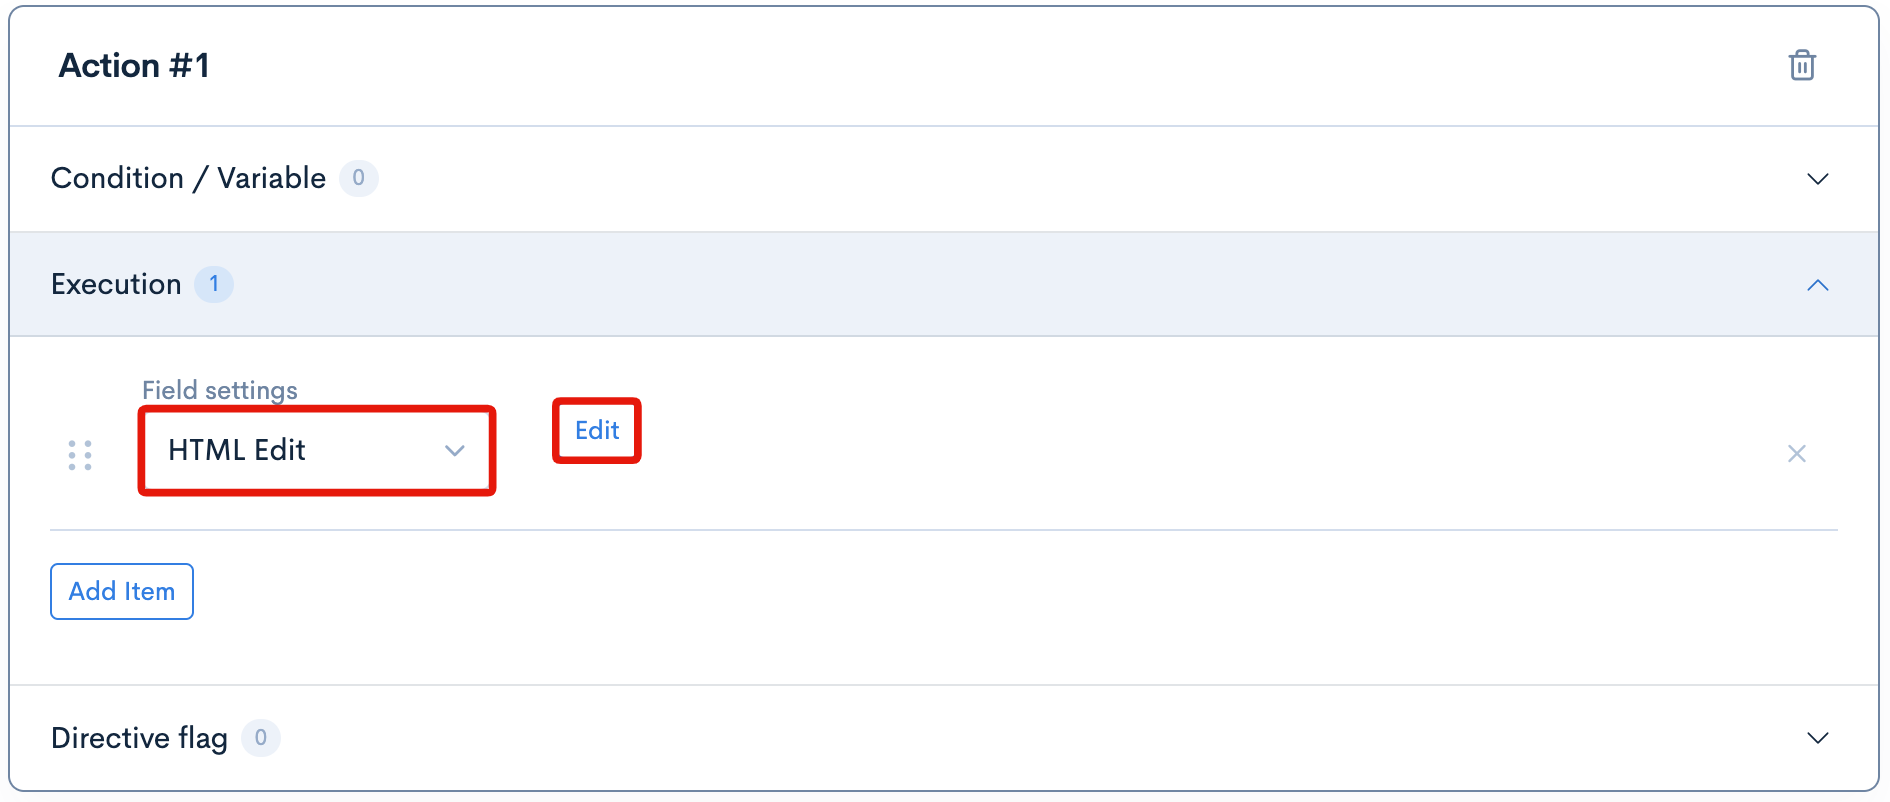
This will display the 'Execution' section's options for this action. In the select/dropdown element, select the [HTML Edit] option, then click on the [Edit] button that appears on the right:
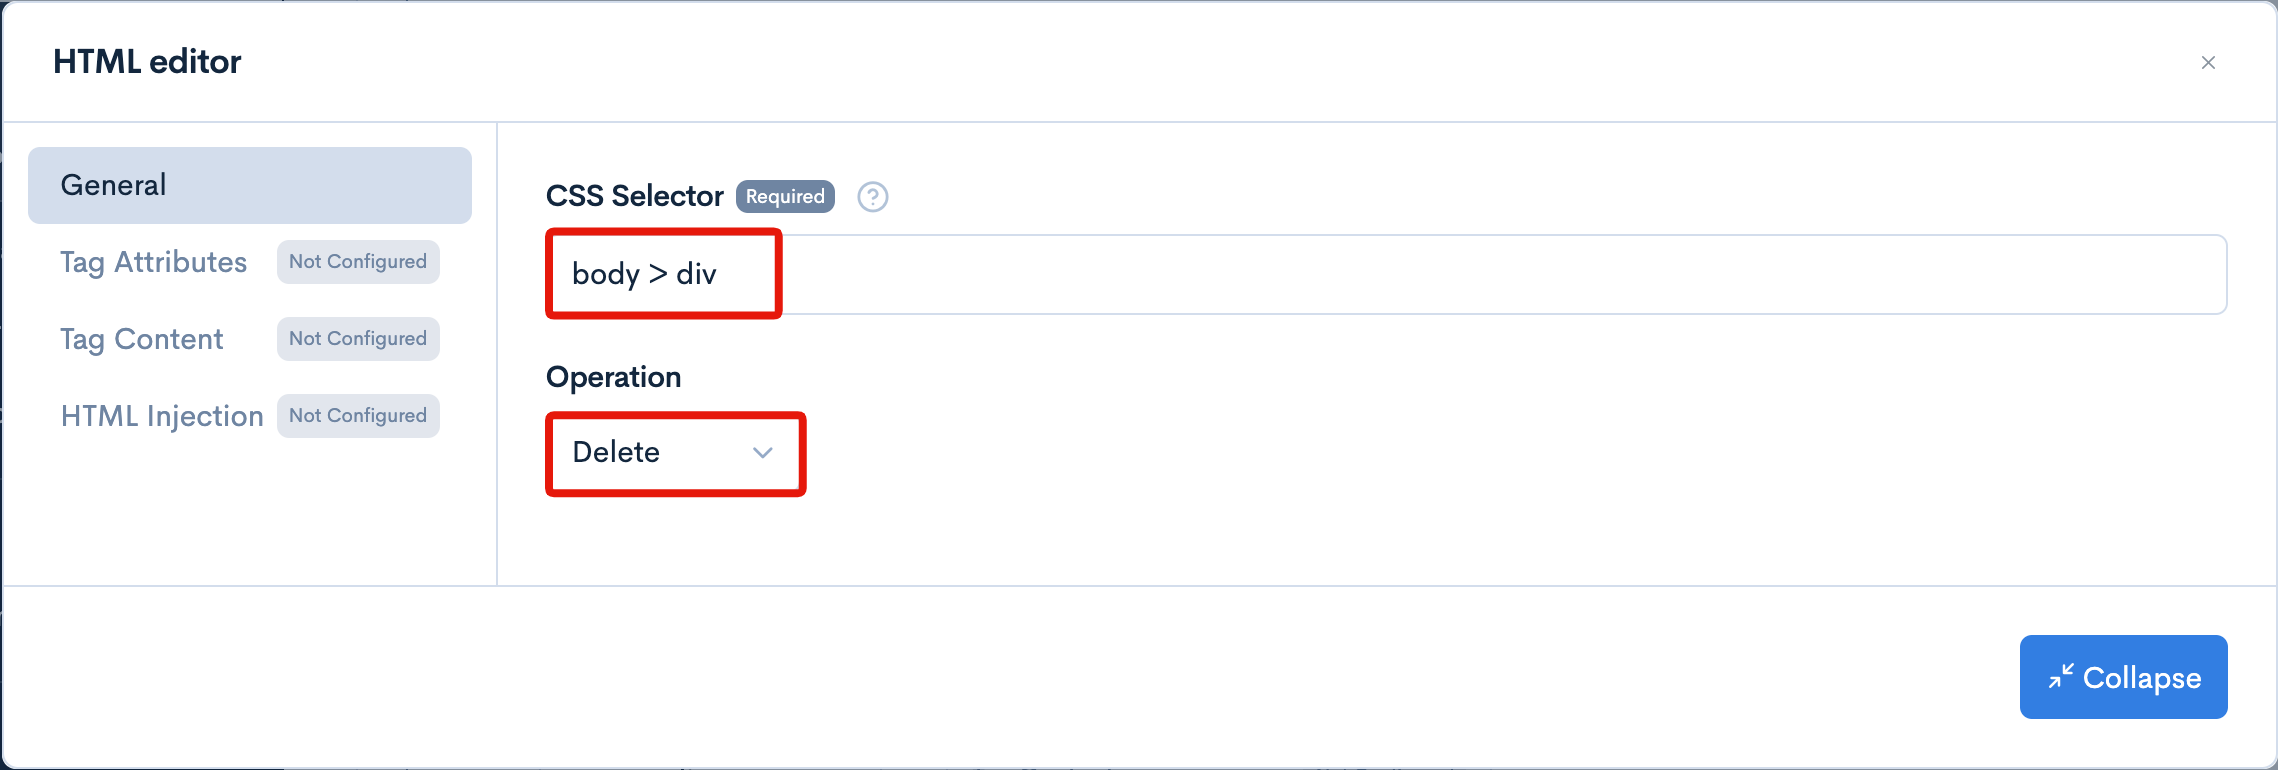
A modal popup window will appear.
Configure the settings as follows:
| Item | Value |
|---|---|
| CSS Selector | body > div |
| Operation | Delete |
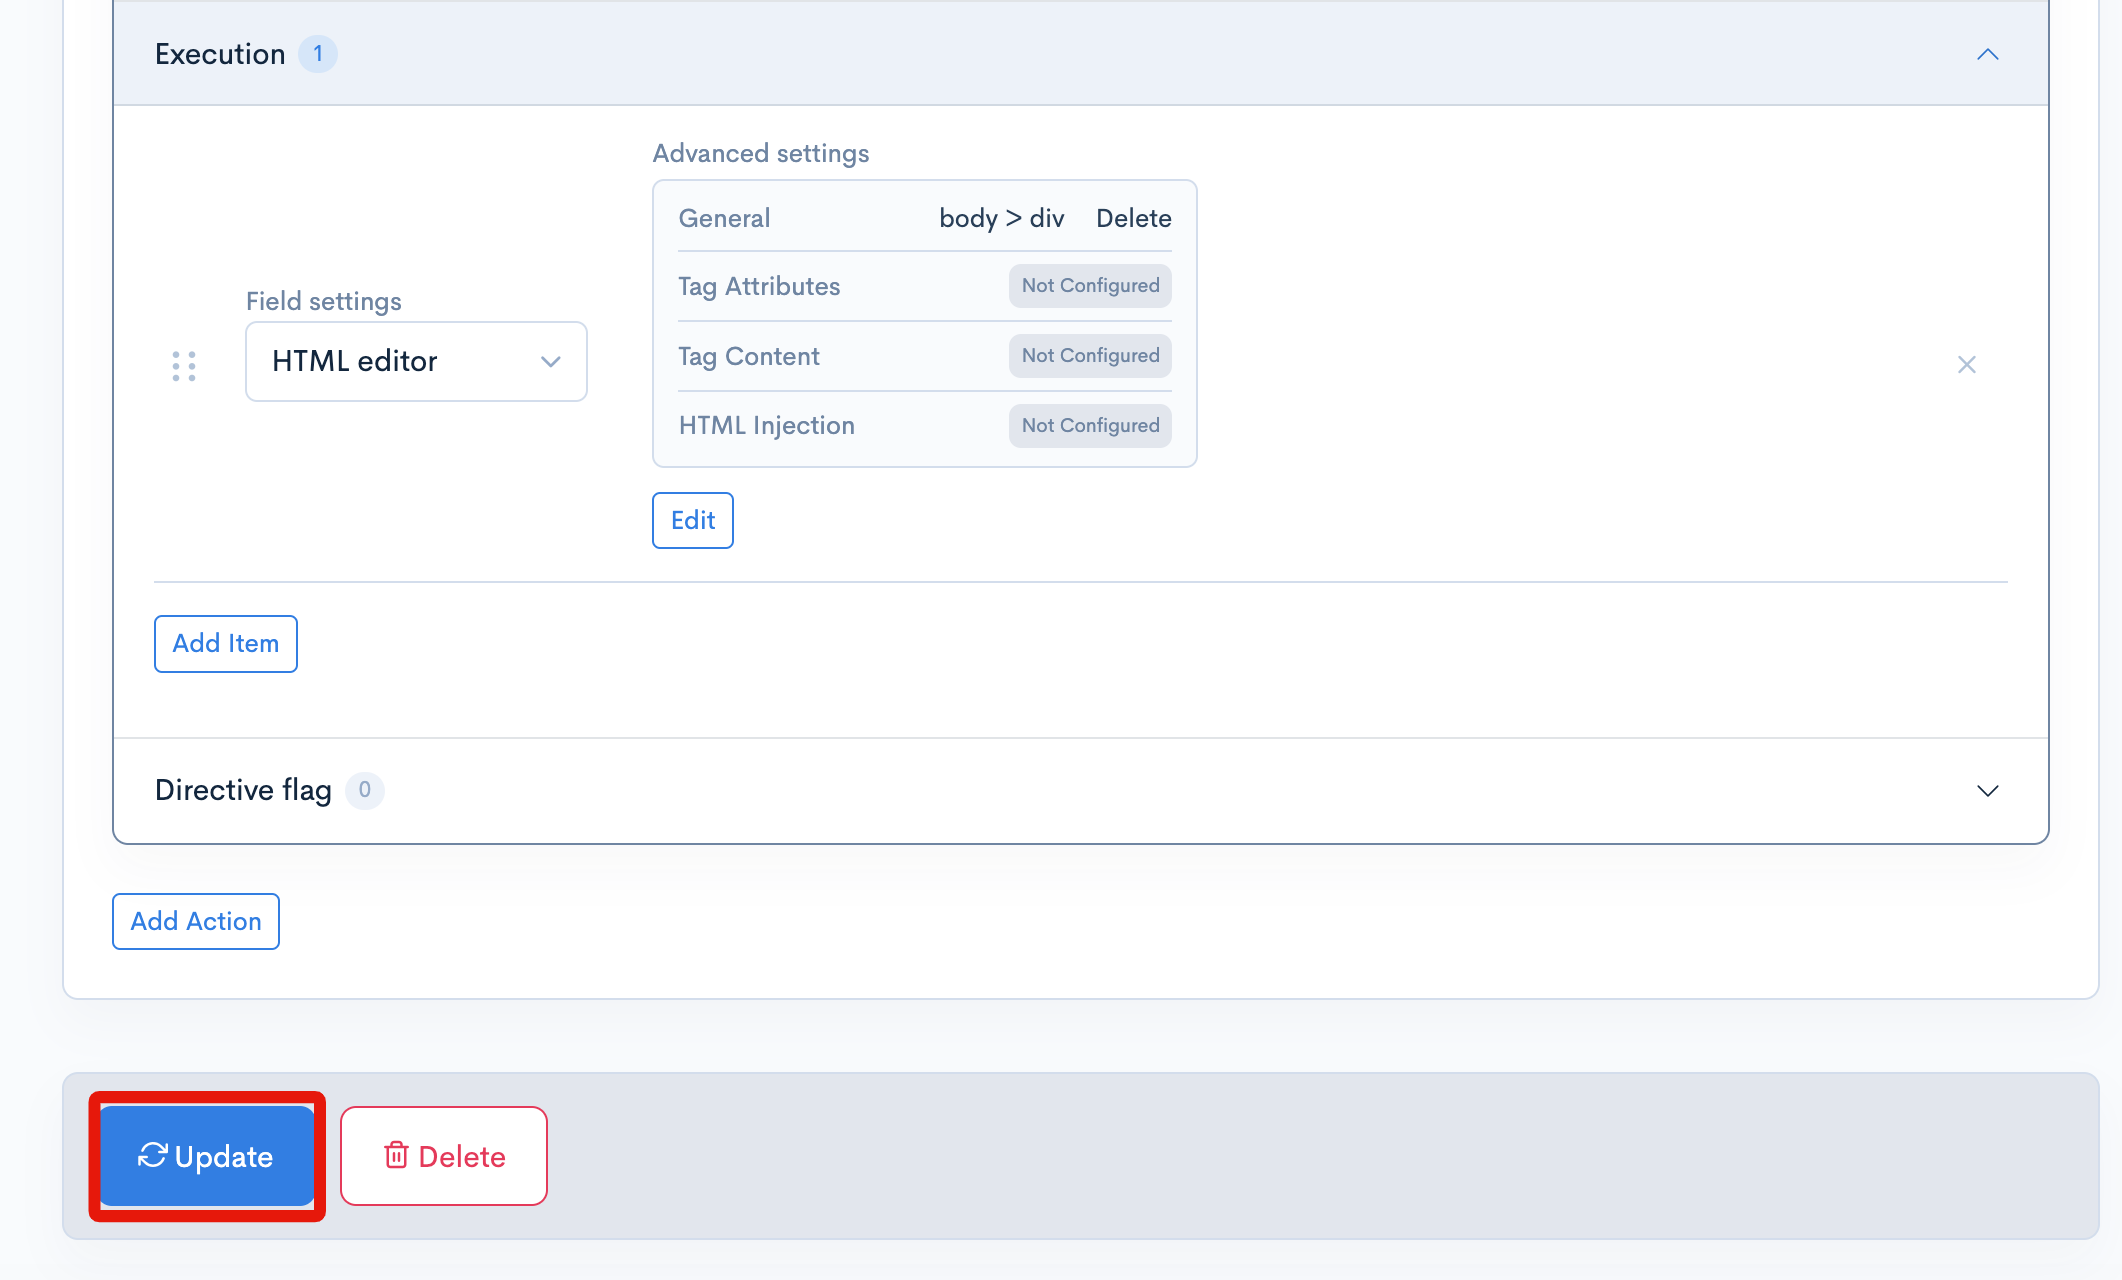
Once you have completed the settings, collapse the window, and a summary of your settings will be displayed:
Finally, click the [Update] button at the bottom left of the page to save the changes.
Confirm the Element Has Been Removed
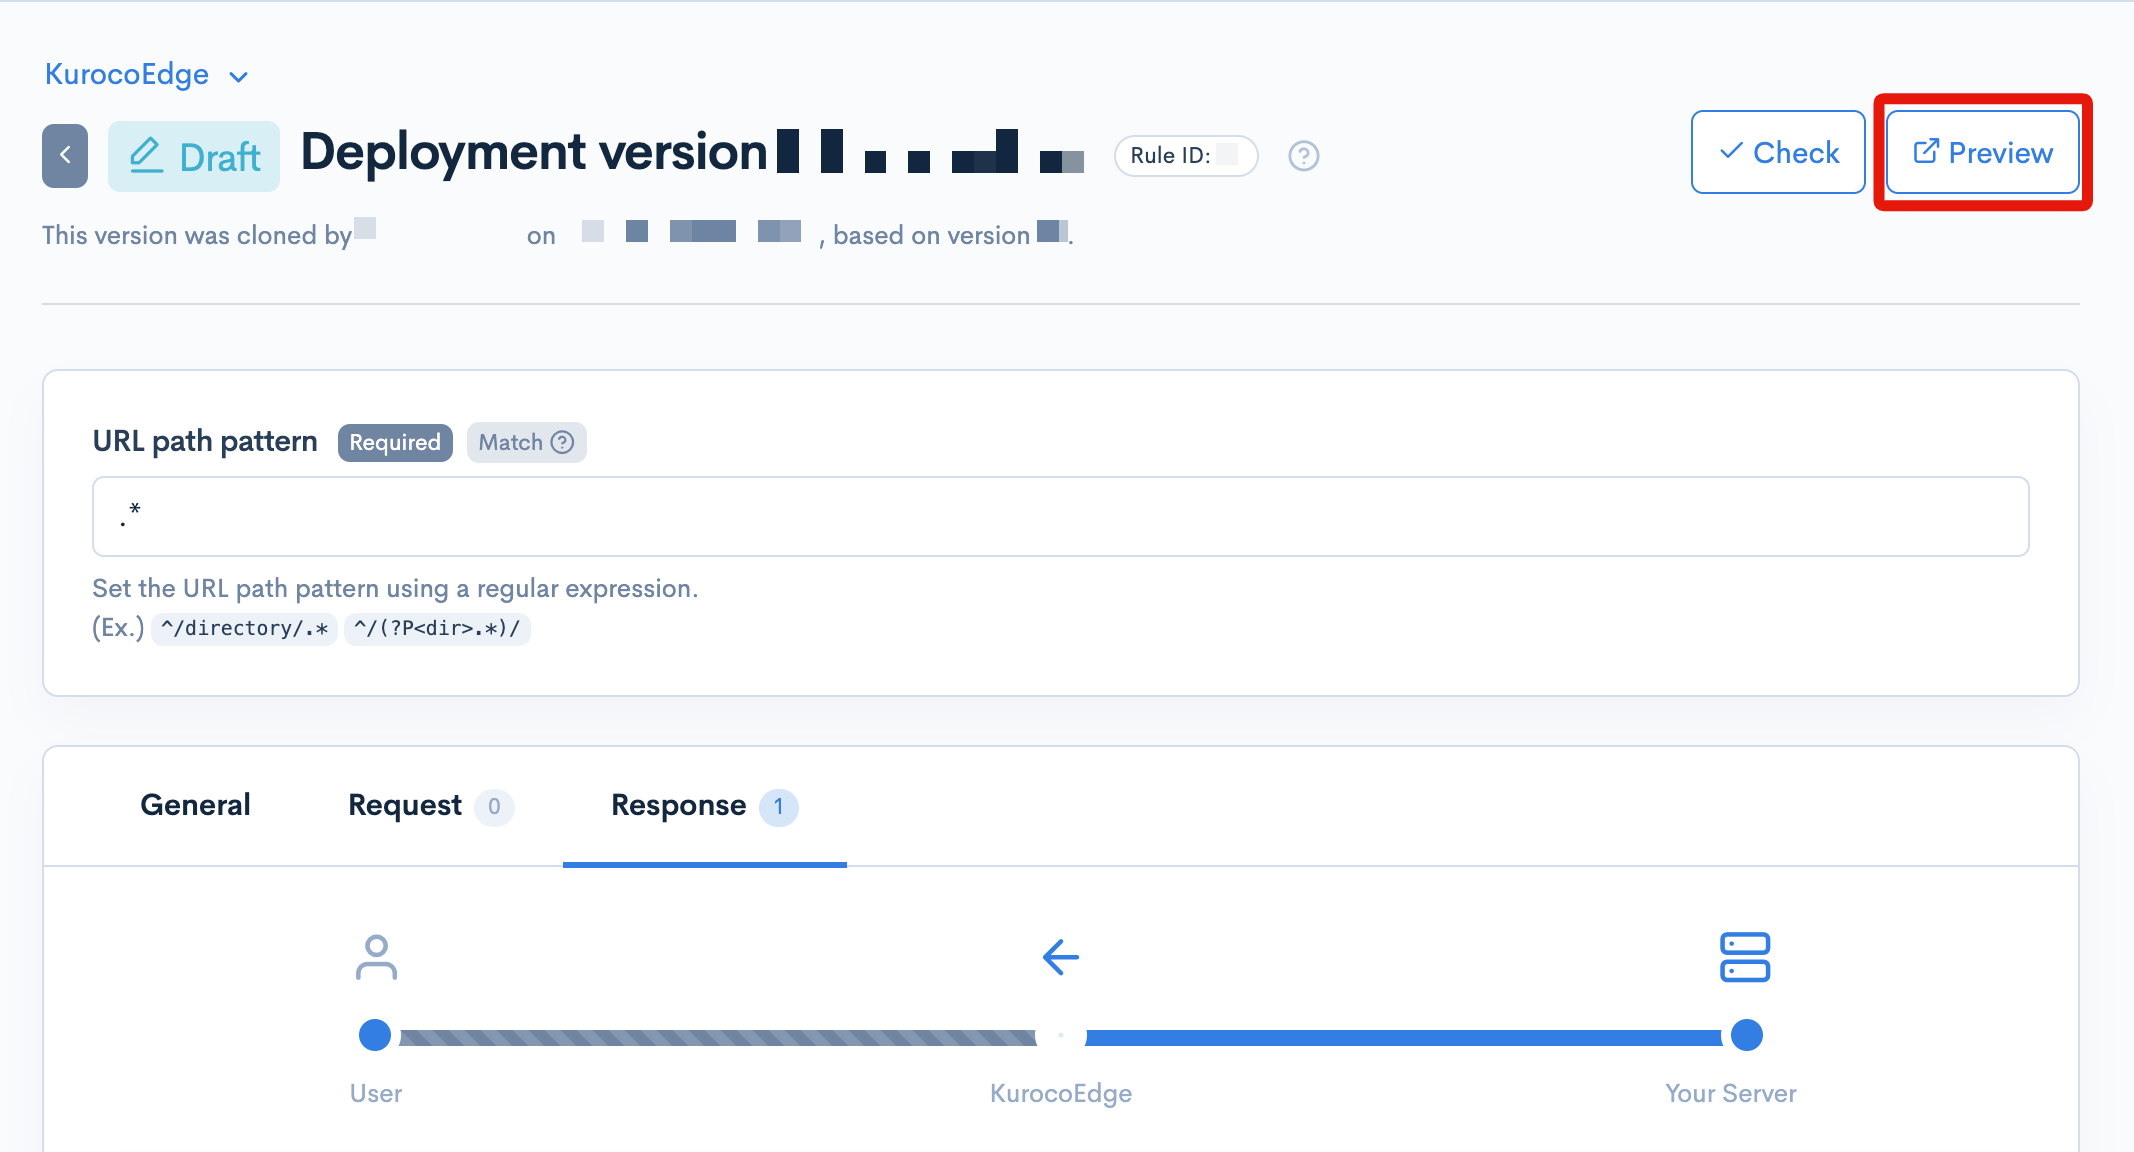
To confirm that the HTML element has been removed as intended, first click on the [Preview] button at the top-right of the KurocoEdge Admin Panel to open up a preview of your site in a new tab in your broswer.
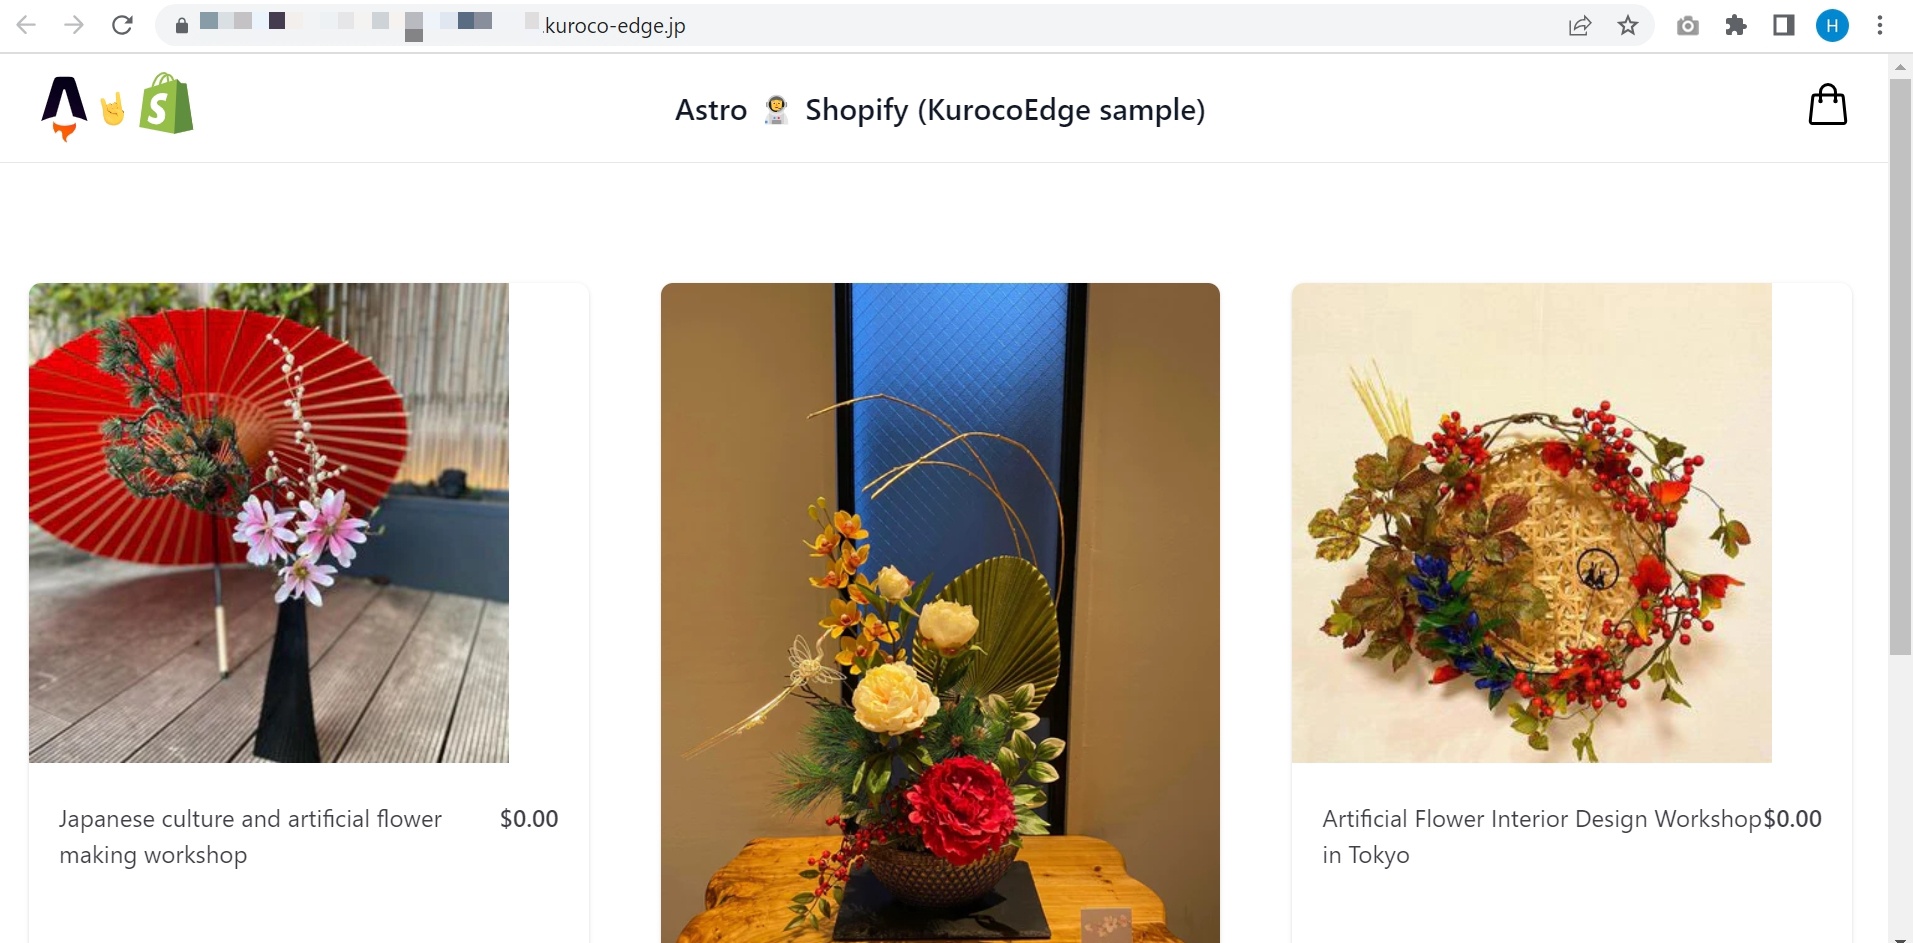
If the operation was successful, in most cases you should immediately be able to see that the element is no longer visible on the page.
However, to confirm that the element has actually been removed from the DOM, right-click on the page and and click on 'View Page Source' again. When search for the 'div' tag, it should have been removed entirely from the page.
Alternatively, if you had instead selected the option to Hide the element, rather than Delete it, then in the page's source code you should still be able to see the 'div' tag; except that now it a new inline 'style' attribute added to it set to 'display: none' (this means the element will not be visible on the page, but is still present in the DOM).
Summary
At this point you have successfully verified that the HTML element you selected has been removed (either 'hidden' on the page, or 'deleted' from the DOM), using KurocoEdge. This operation was achieved by proxy 'on the edge' – with no changes required to your server's source code or any alterations being made to the content on your CMS (if you are using one).
Support
If you have any other questions, please contact us or check out Our Discord Community.