Changing the Display of Your Website
Estimated Time: 5 minutes
Overview
KurocoEdge is a service that allows adding various functionalities to any website without modifying the existing system. As a beginner's guide, we have prepared the following three steps:
- Changing the Display of a Sample Site
- Changing the Display of Your Website
- Integrating KurocoEdge
In this tutorial, we will change the display of your own website.
Confirm that KurocoEdge is Working
Let's set up a simple rule and verify its operation. As an example, we will replace the display of [Our Values] on the Diverta corporate website with [Our Missions].
Replace the URL with your own site and perform the verification.

Adding a Backend Host
First add the site that you want to optimize as a backend host. Click [KurocoEdge]->[Backend List].
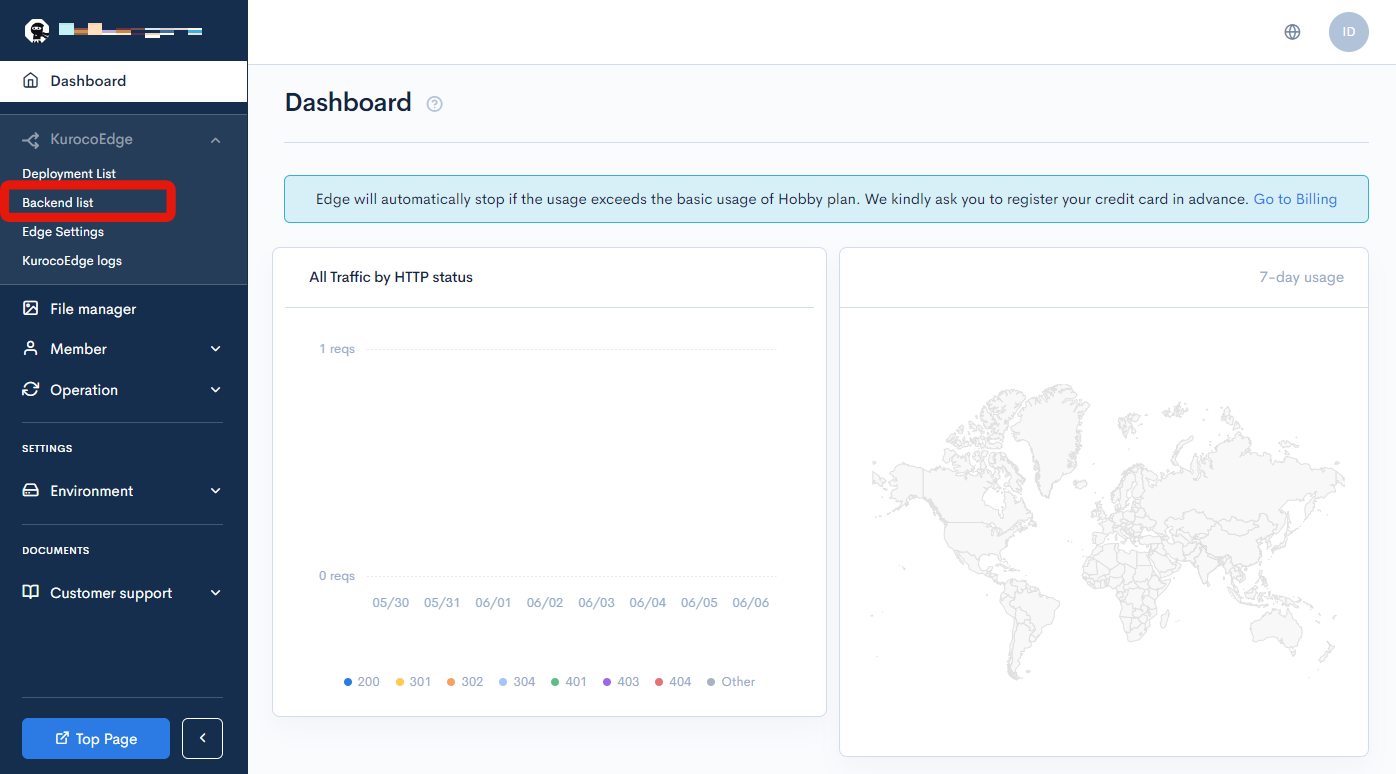
A list of backend hosts will be displayed. Click [Add].
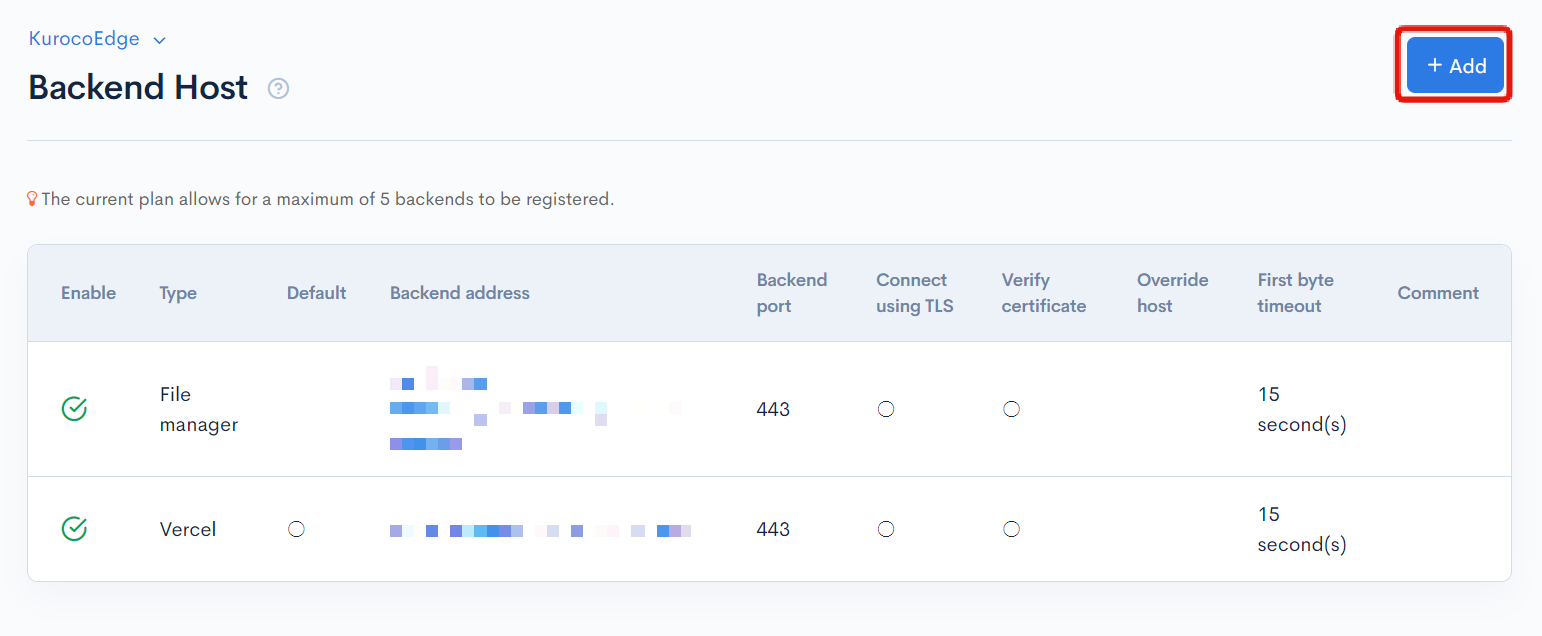
The screen for adding backend hosts will be displayed. Configure the settings as follows:
| Item | Value |
|---|---|
| Backend Address | Enter the CNAME or IP address currently set as the domain of the existing site |
| Override Host | check the [Set up] and enter the domain of the existing site to be optimized by KurocoEdge |
| Backend Port | 443 *Enter 80 if the existing site uses http communication |
| Connect with TLS | Check this box *If the existing site uses http communication, uncheck it. |
| TLS Certificate Check | Check this box |
| First byte timeout | 15 seconds |
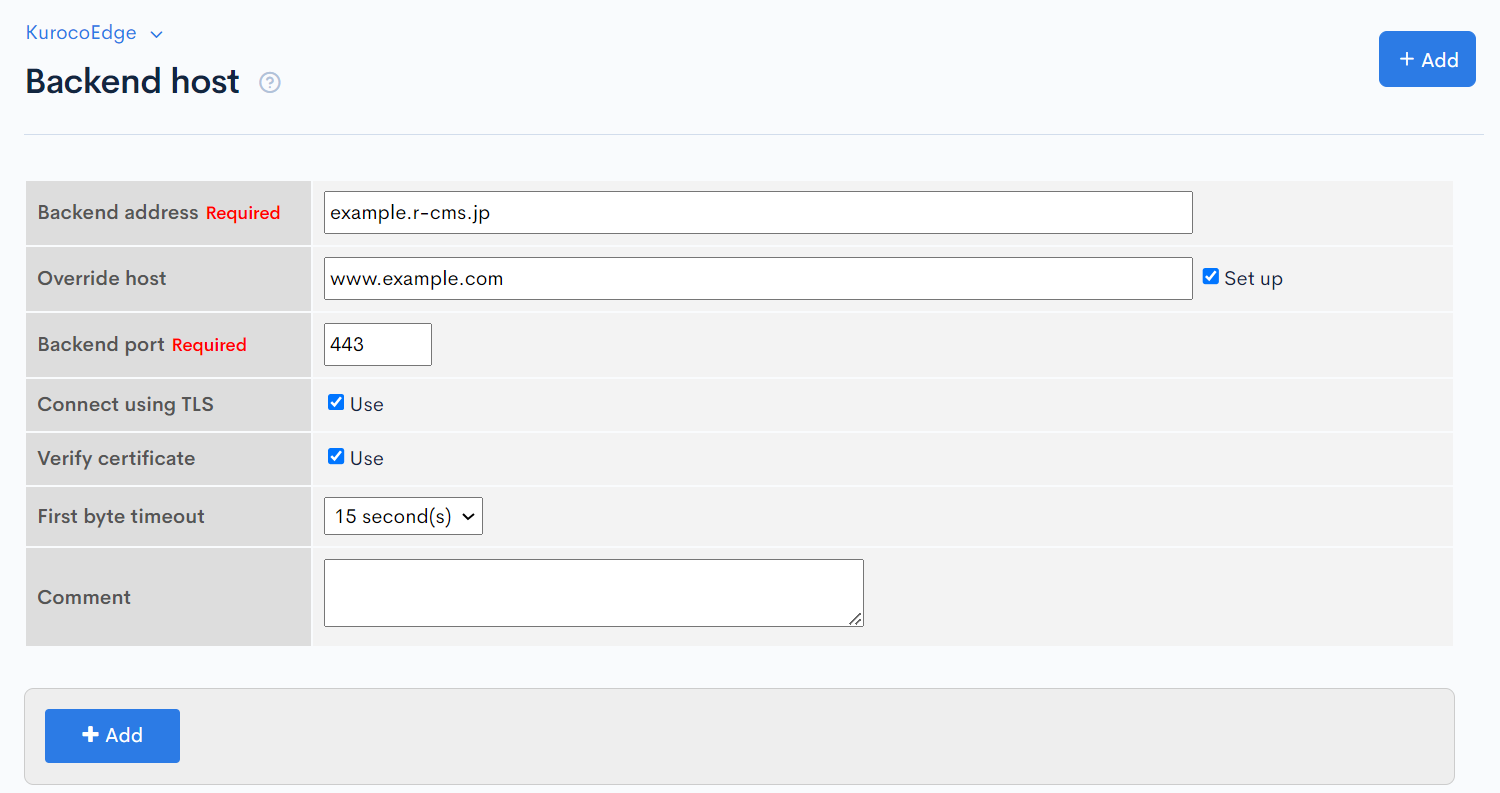
You can check the backend address using the "dig" command (Mac) or the "nslookup" command (Windows).
After completing the settings, click [Add] to add the new backend host.
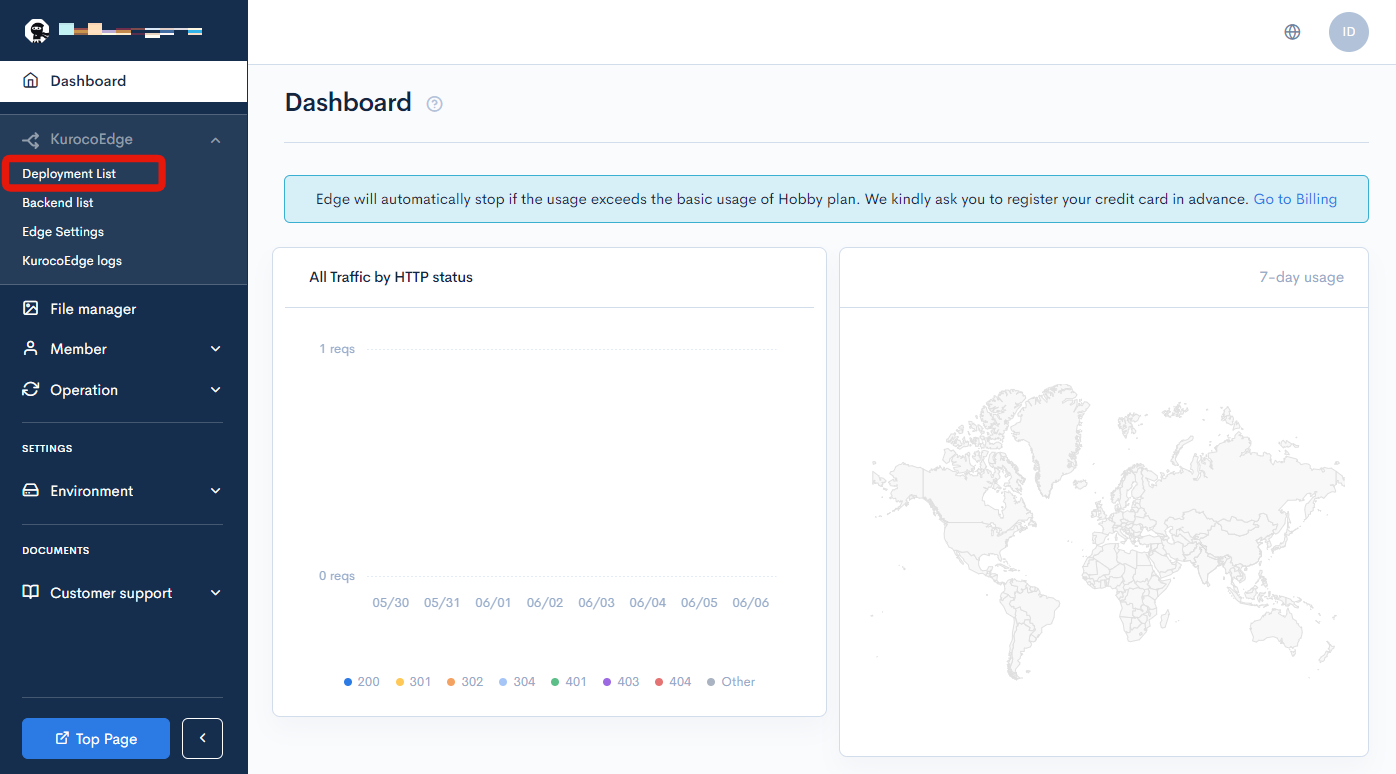
Deployment settings
Click [KurocoEdge]->[Deployment list].
Click on Version 2.
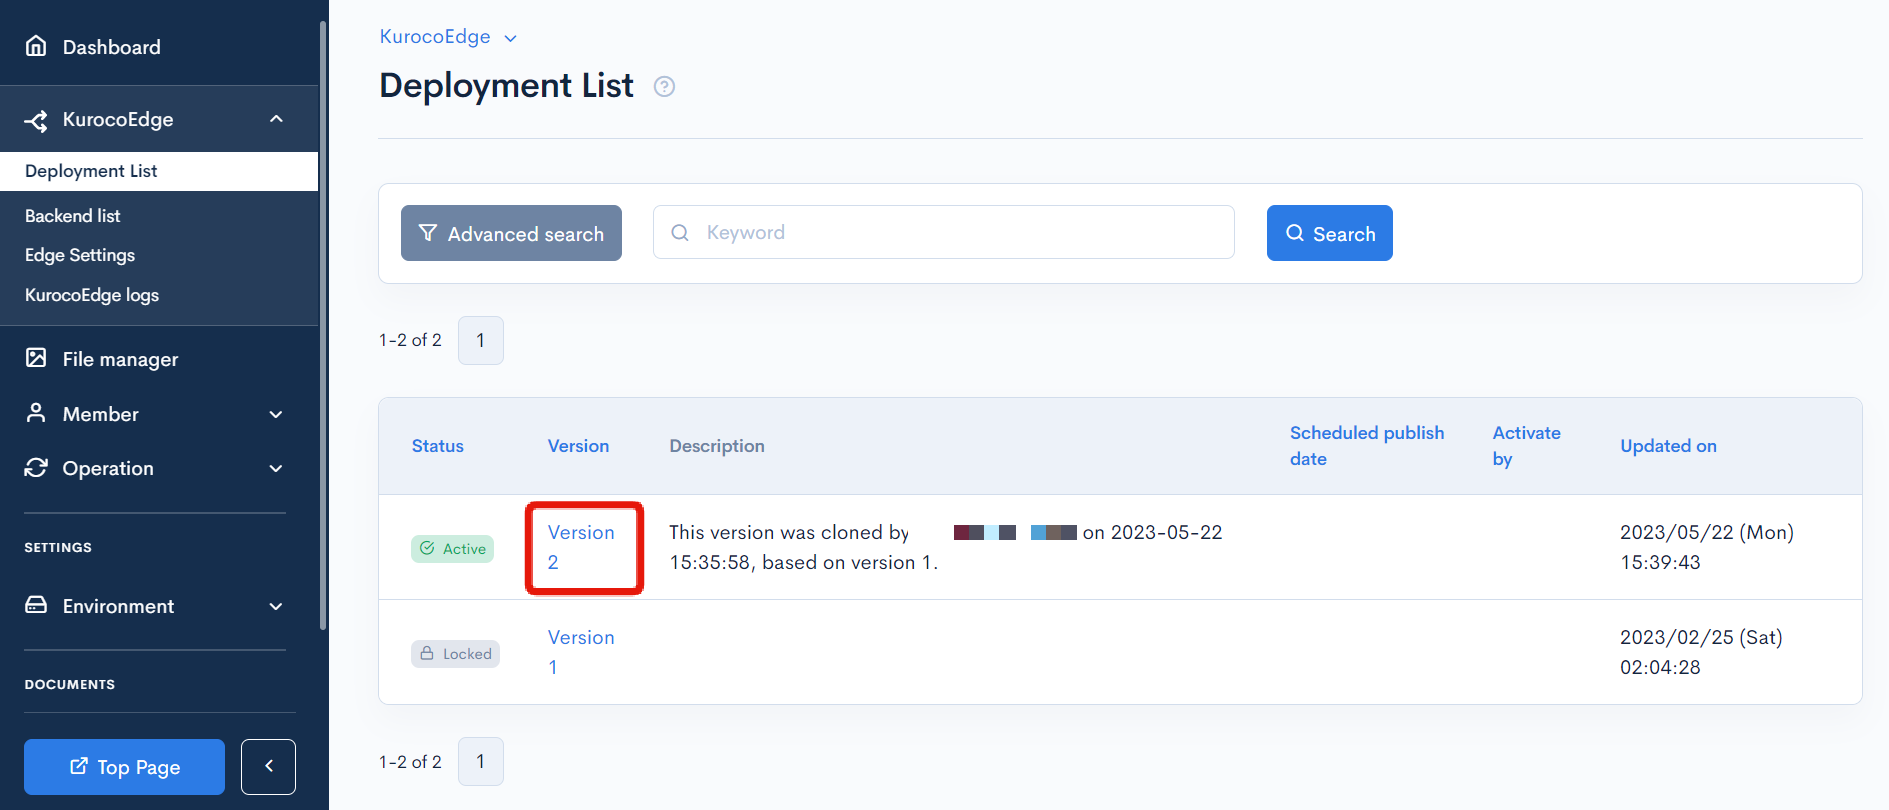
You cannot edit a deployed version with status "Running". Click [Clone] to create a draft deployment.
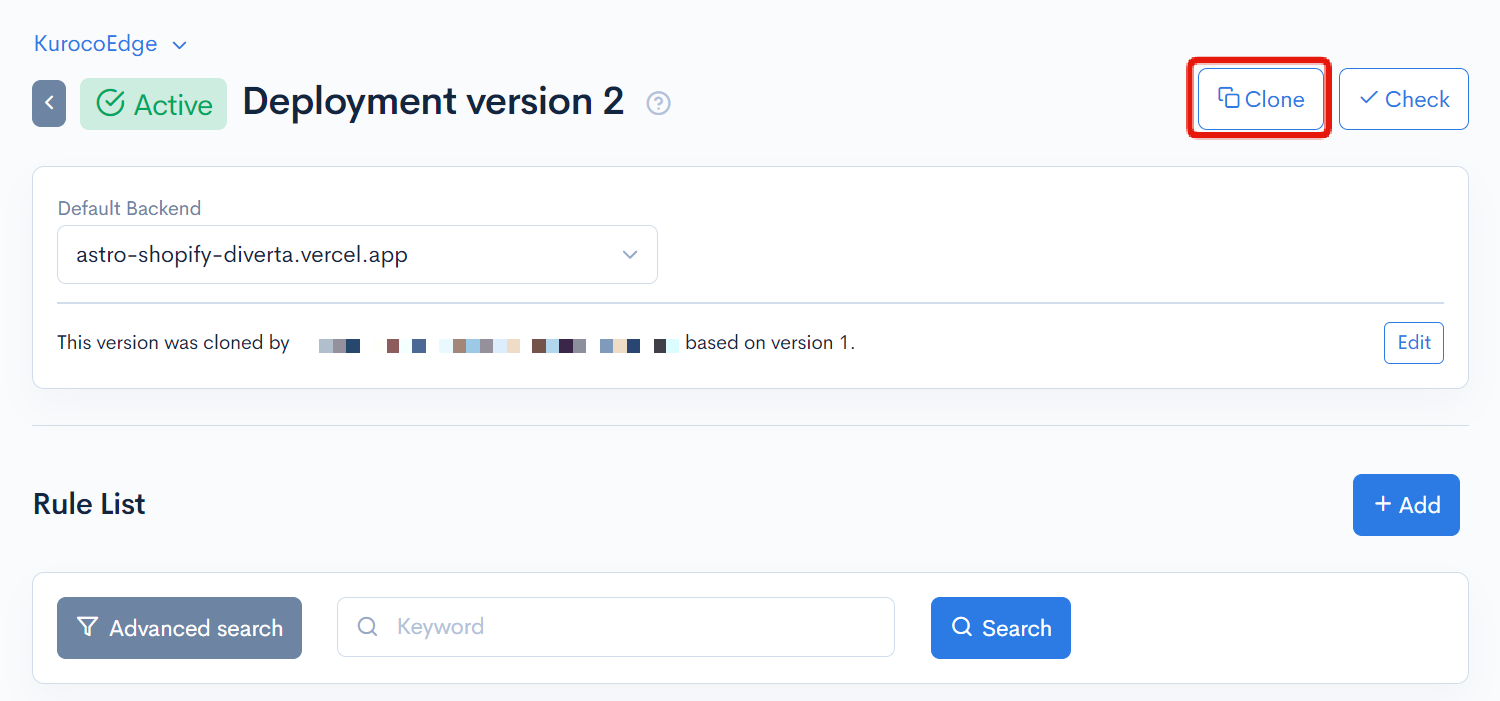
Open the cloned draft deployment and set the default backend to your own site by adding the backend host.
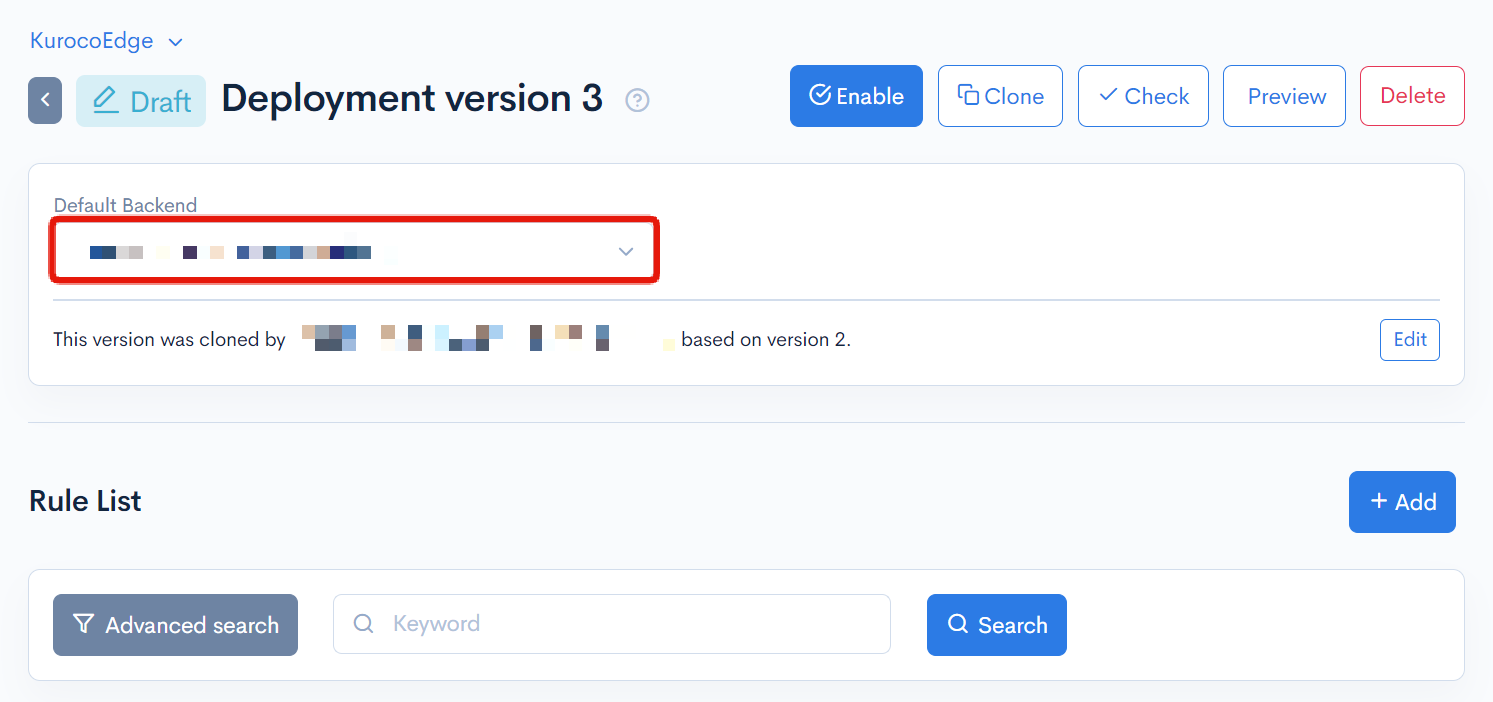
Scroll to the bottom of the page and click on the rule ID in the rule list.
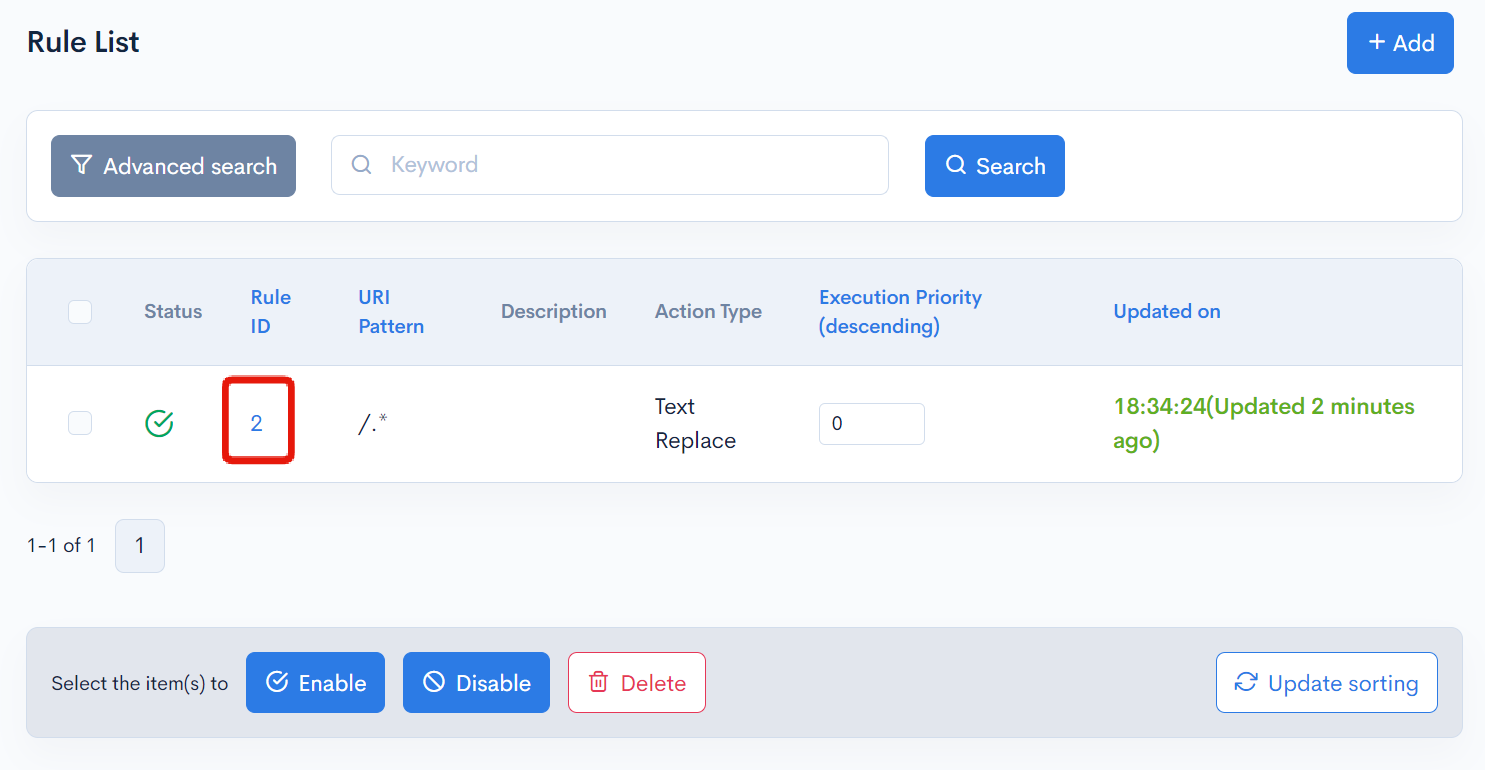
Click on the Response tab.
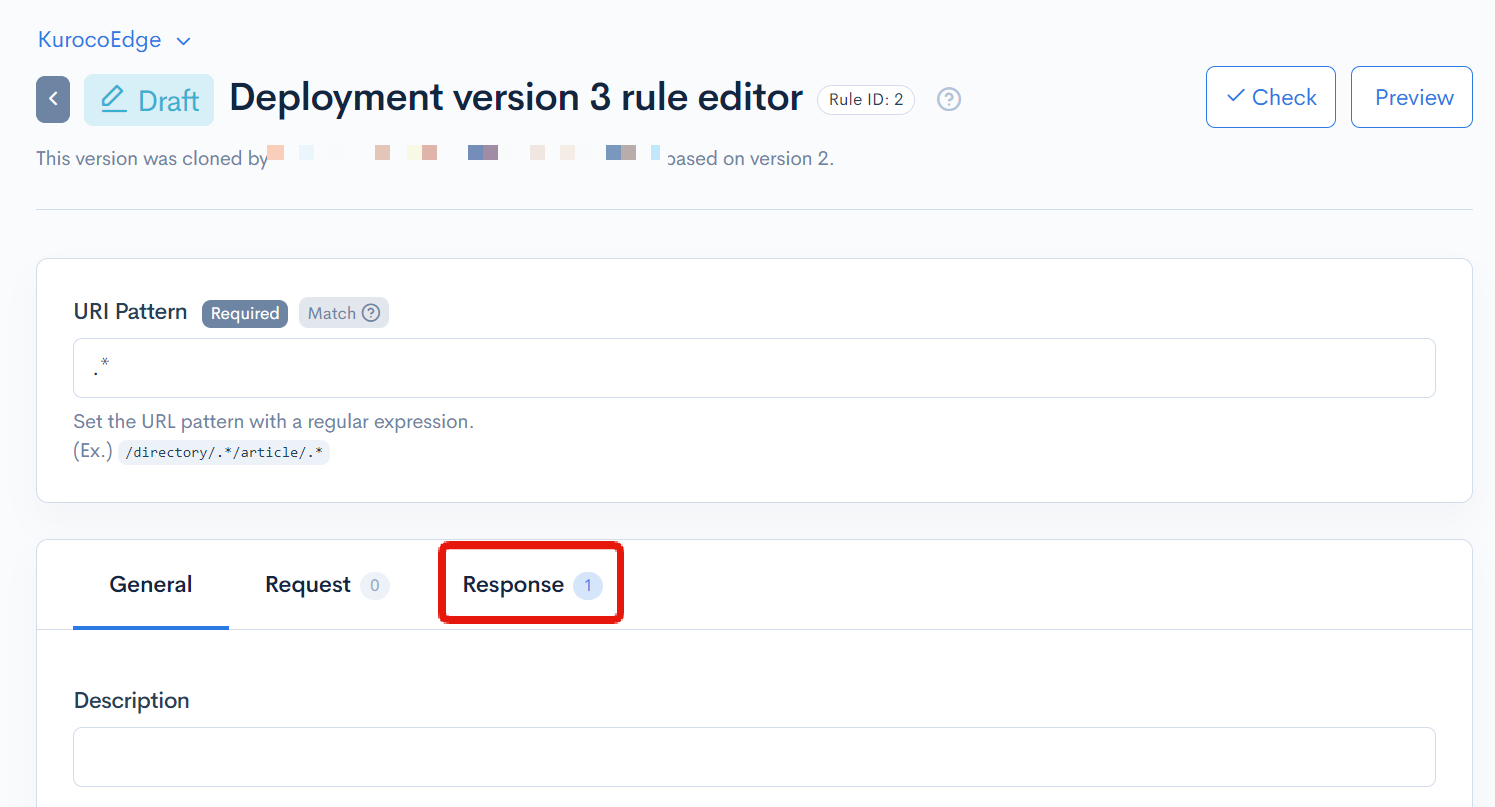
Since a rule has been set for the sample site, make the following changes and click [Update].
| Item | Value |
|---|---|
| Processing | Replace Text |
| Before Replacement | Our Values |
| After Replacement | Our Missions |
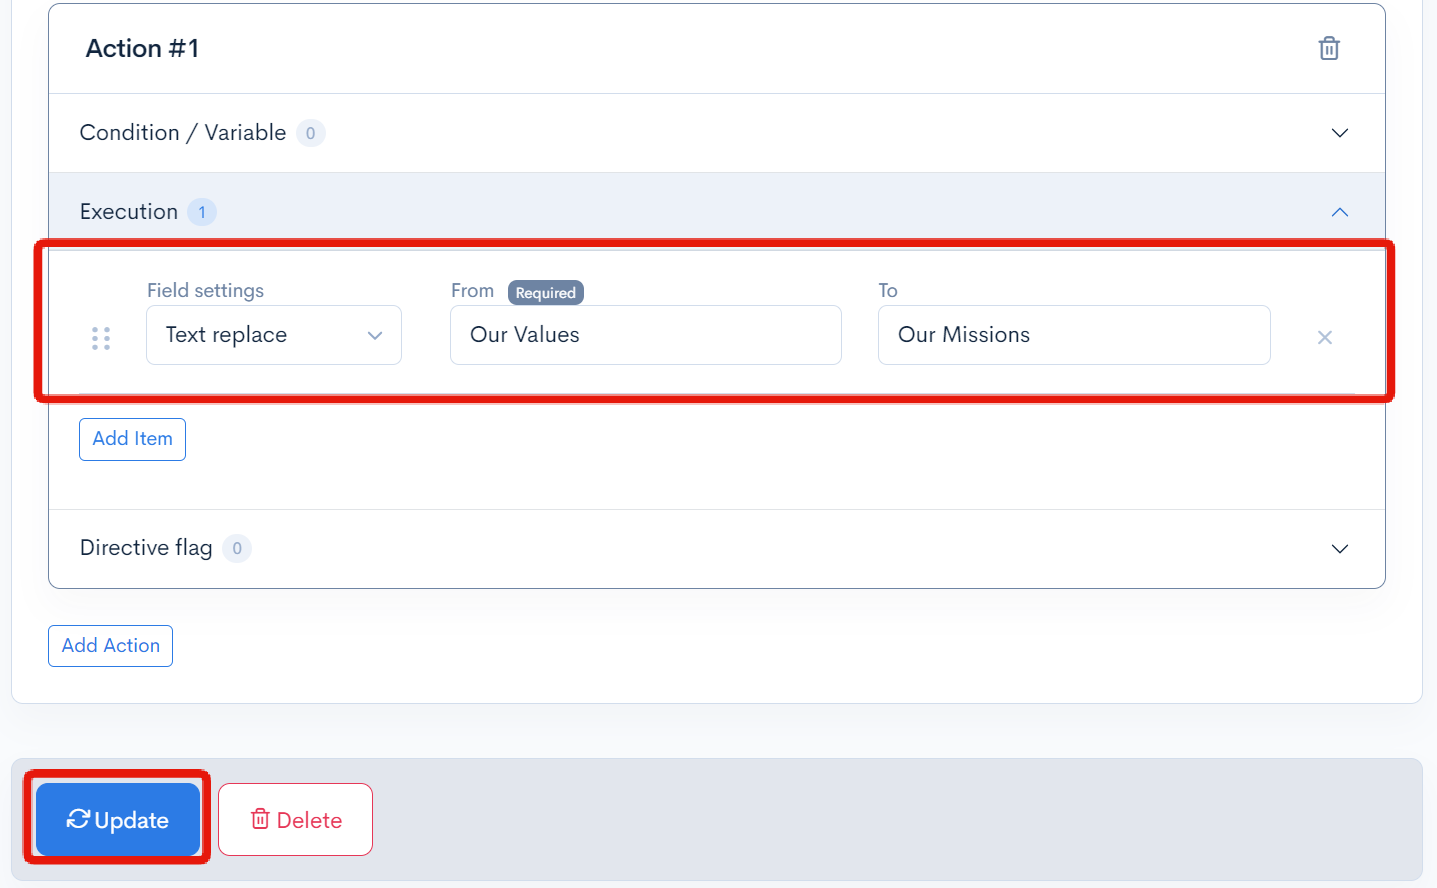
Please adjust the replacement text according to your own website.
When you have finished configuring the settings, click [Preview] to confirm that the added rules are being applied as expected:
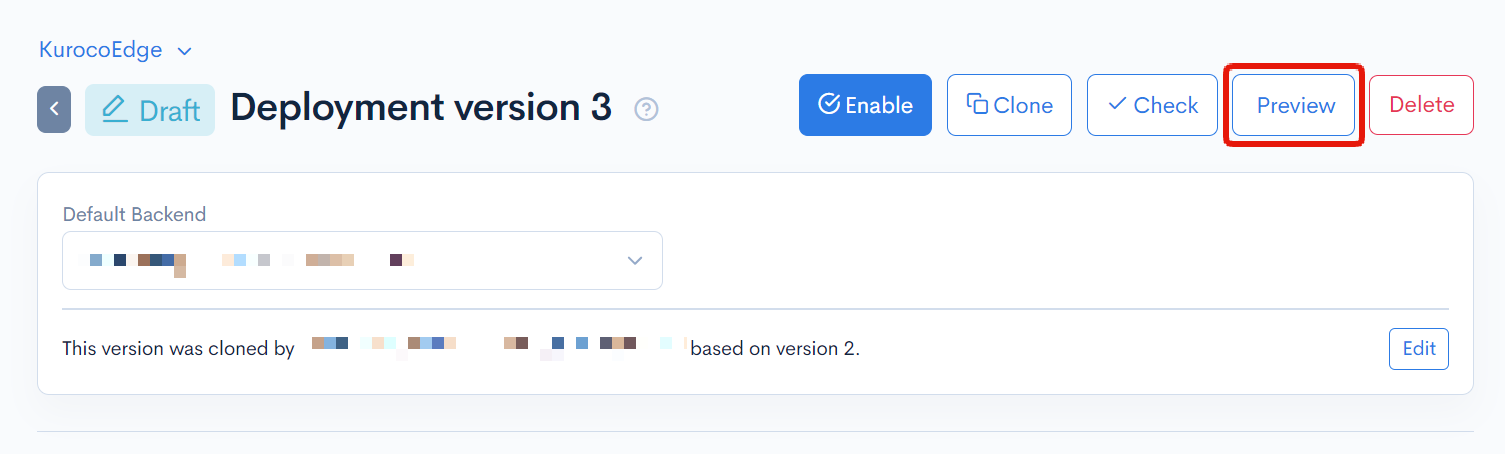
We can see that 'Our Missions' is now being displayed in 'Preview Mode'.

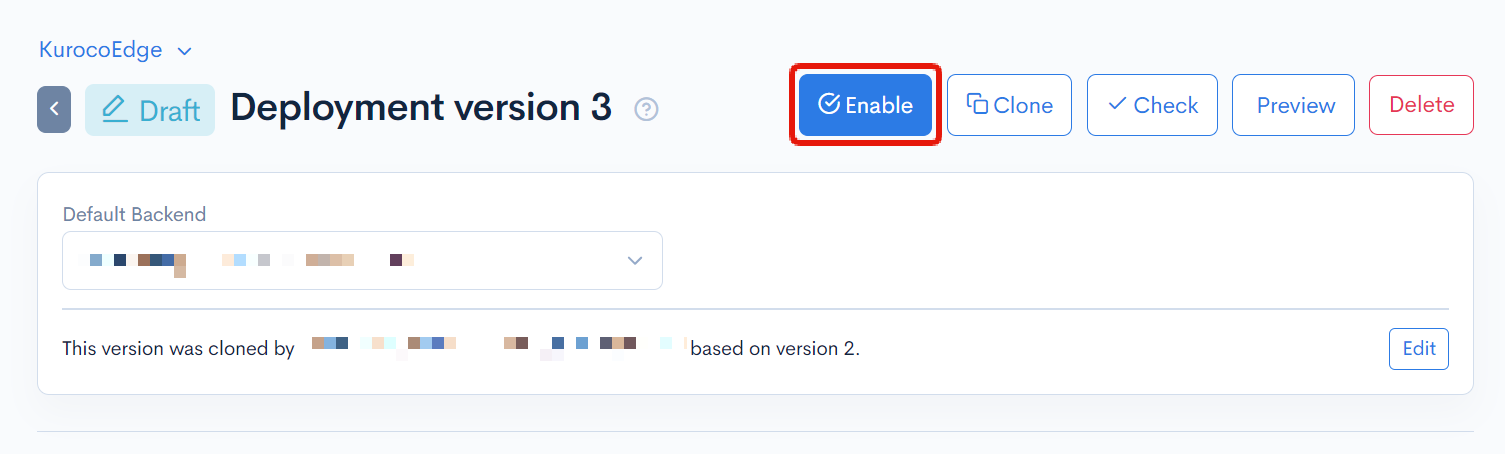
If everything is working as expected, click [Enable] to complete the settings.
Editing is now locked and the deployment is enabled.
Summary
With the above steps, you have been able to test the functionality of KurocoEdge on your own website. You were able to see how KurocoEdge works in preview mode, but the rules of KurocoEdge are not applied to the actual site.
Next, let's actually integrate KurocoEdge and apply the rules you have set up.
Support
If you have any other questions, please contact us or check out Our Discord Community.